Boardnest — Storyboarding

Boardnest Manual

From importing a Scriptnest screenplay, splitting it into cuts, drawing them in vector graphics, to playing back and exporting as an animatic — follow the entire storyboarding workflow on real screens.

6 chapters / 34 topics · 70 screenshots

1Creating a New Project and Linking a Screenplay

Production begins by structuring your project. Boardnest integrates closely with the screenwriting tool Scriptnest, enabling a seamless transition from text to visuals.

Starting and Managing a Project

Creating a New Project#

Click the “Create New Project” button at the top right of the project list screen.
Figure 1.1: New project creation button

Naming the Project#

Enter a project name in the dialog and select “Create.”
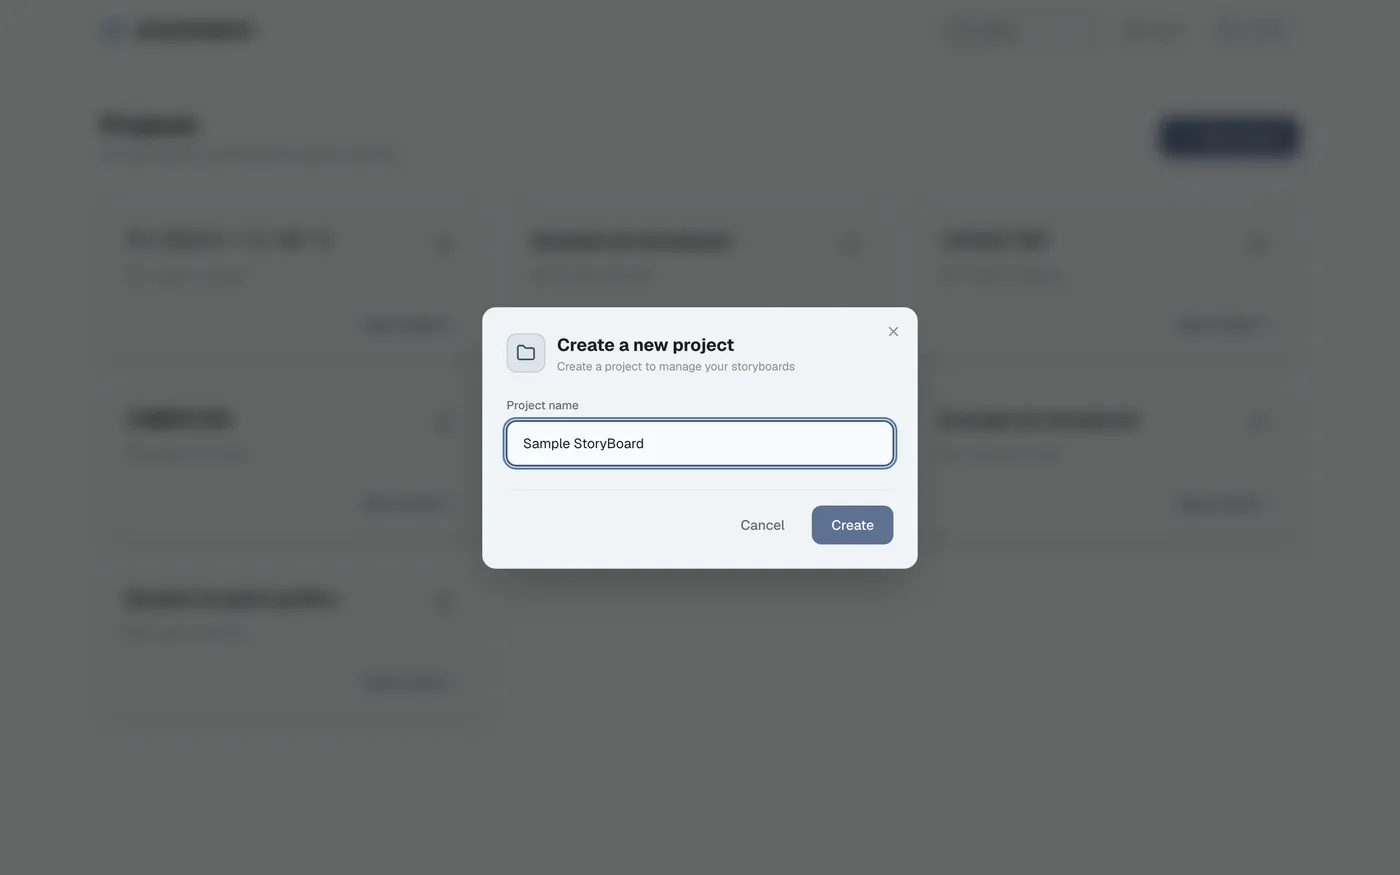
Figure 1.2: Project name entry screen

Accessing the Management Screen#

Click “Open Project” on the newly created project card to enter the project structure management screen.

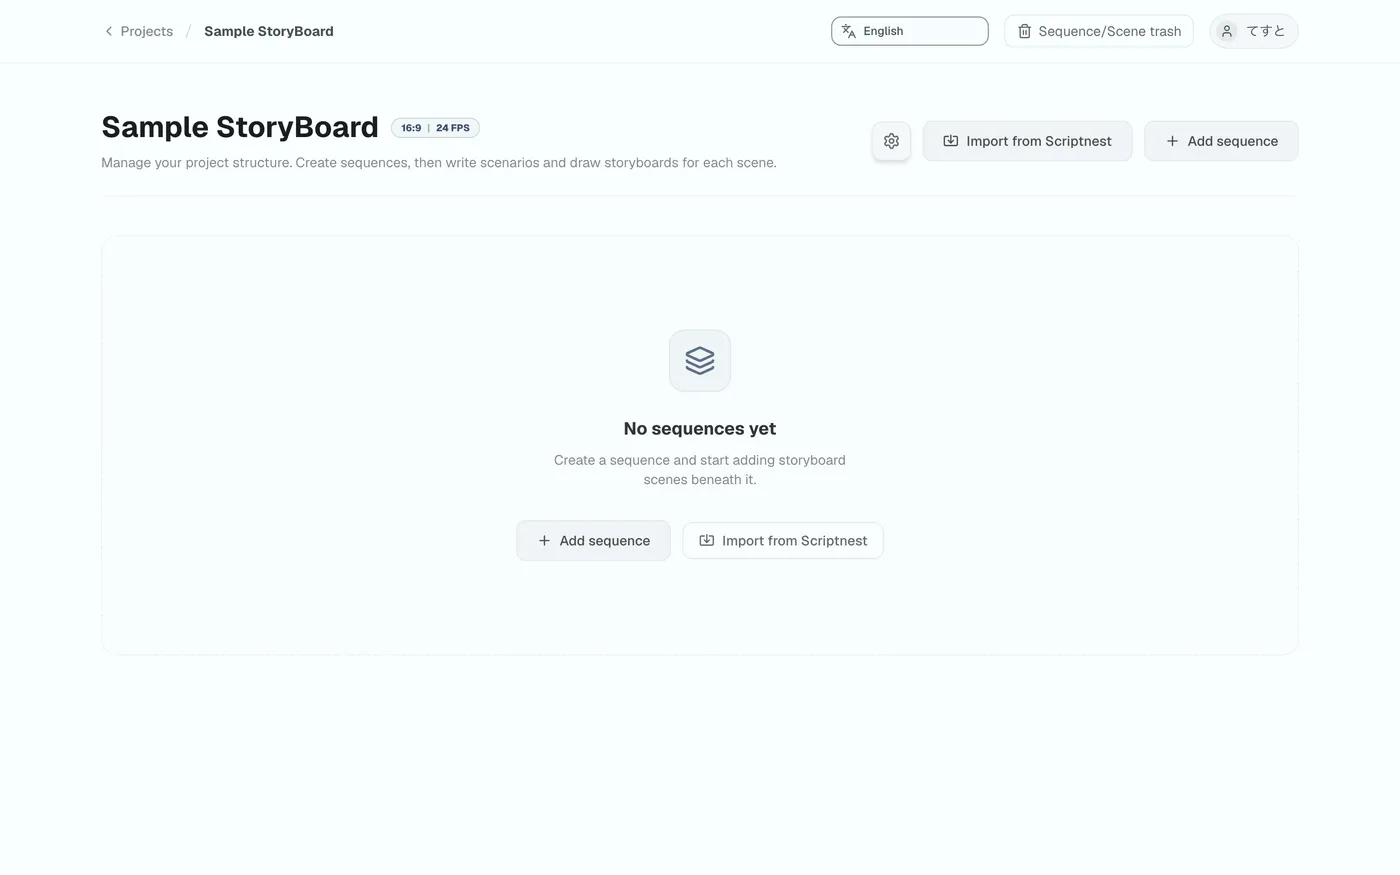
Figure 1.3: Opening a project
Figure 1.4: Project structure management screen

Importing a Screenplay from Scriptnest

Pressing the Scriptnest Import Button#

Start the import process from the button at the top of the screen.
Figure 1.5: Scriptnest import button

Selecting a Project and Line#

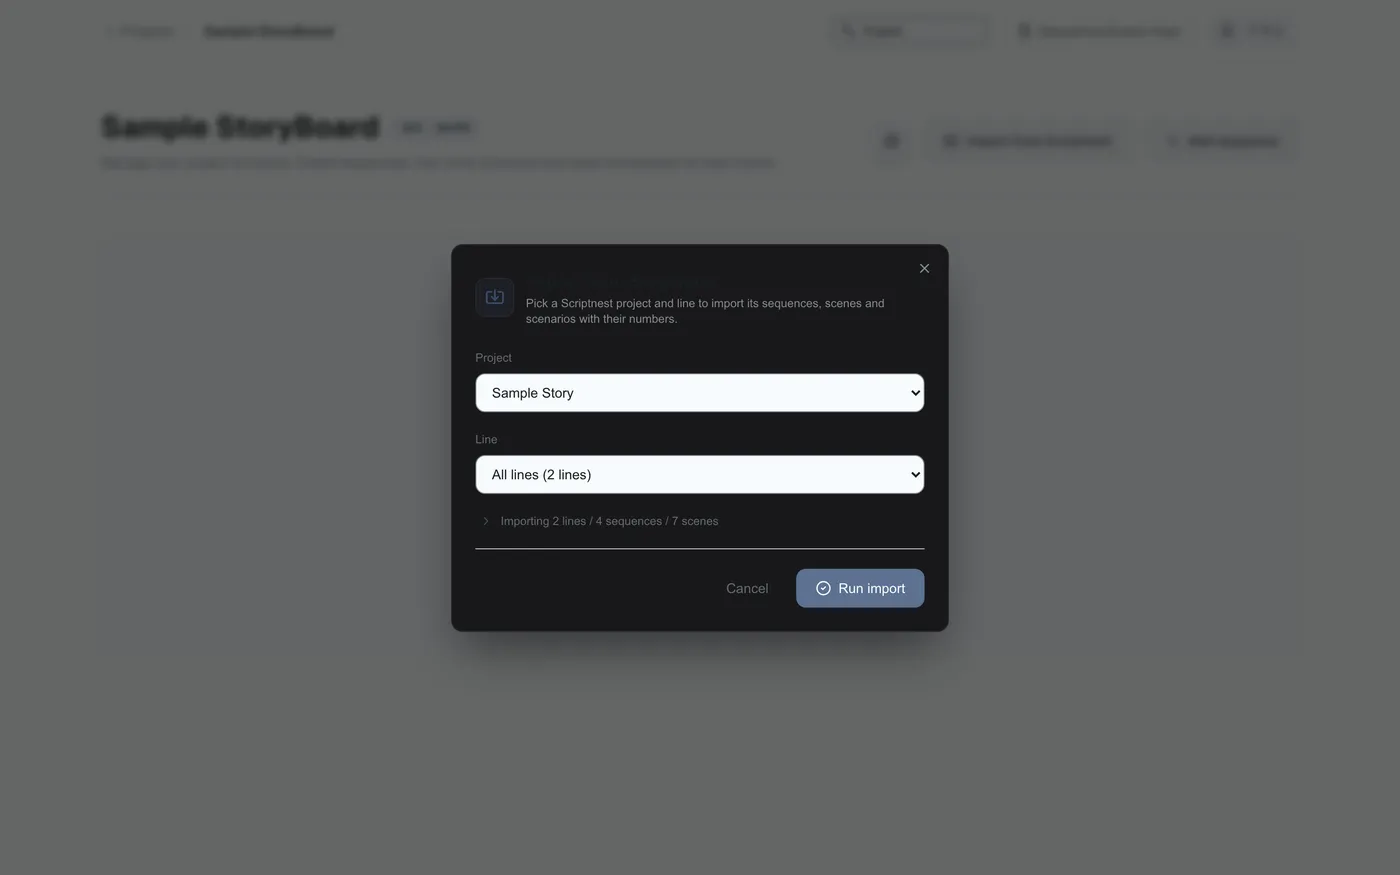
Select the target project and line, then run the import.
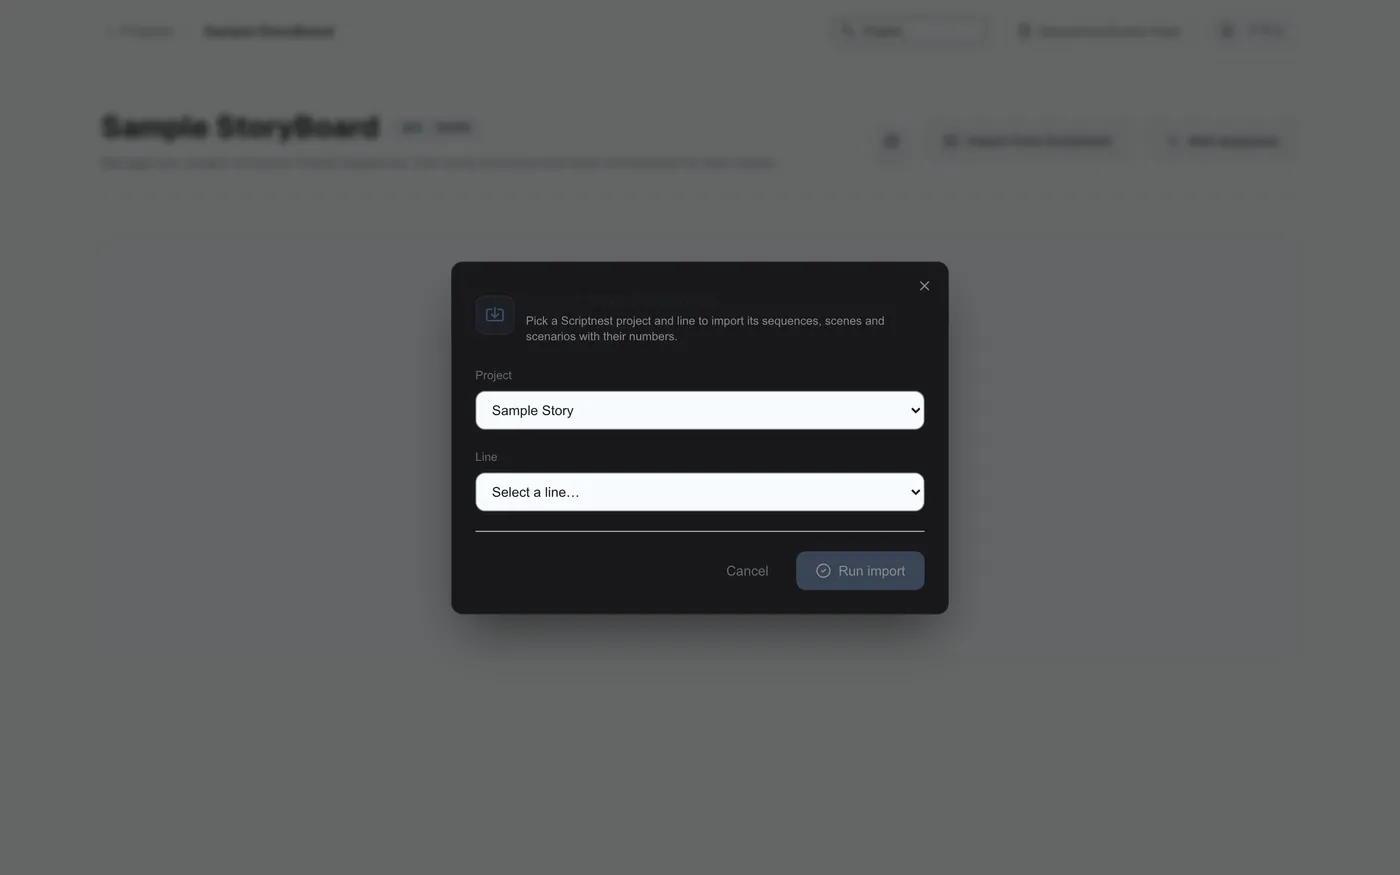
Figure 1.6: Selecting the Scriptnest project
Figure 1.7: Selecting a line and running the import

Import Complete#

Scene and line information is automatically incorporated into the project.
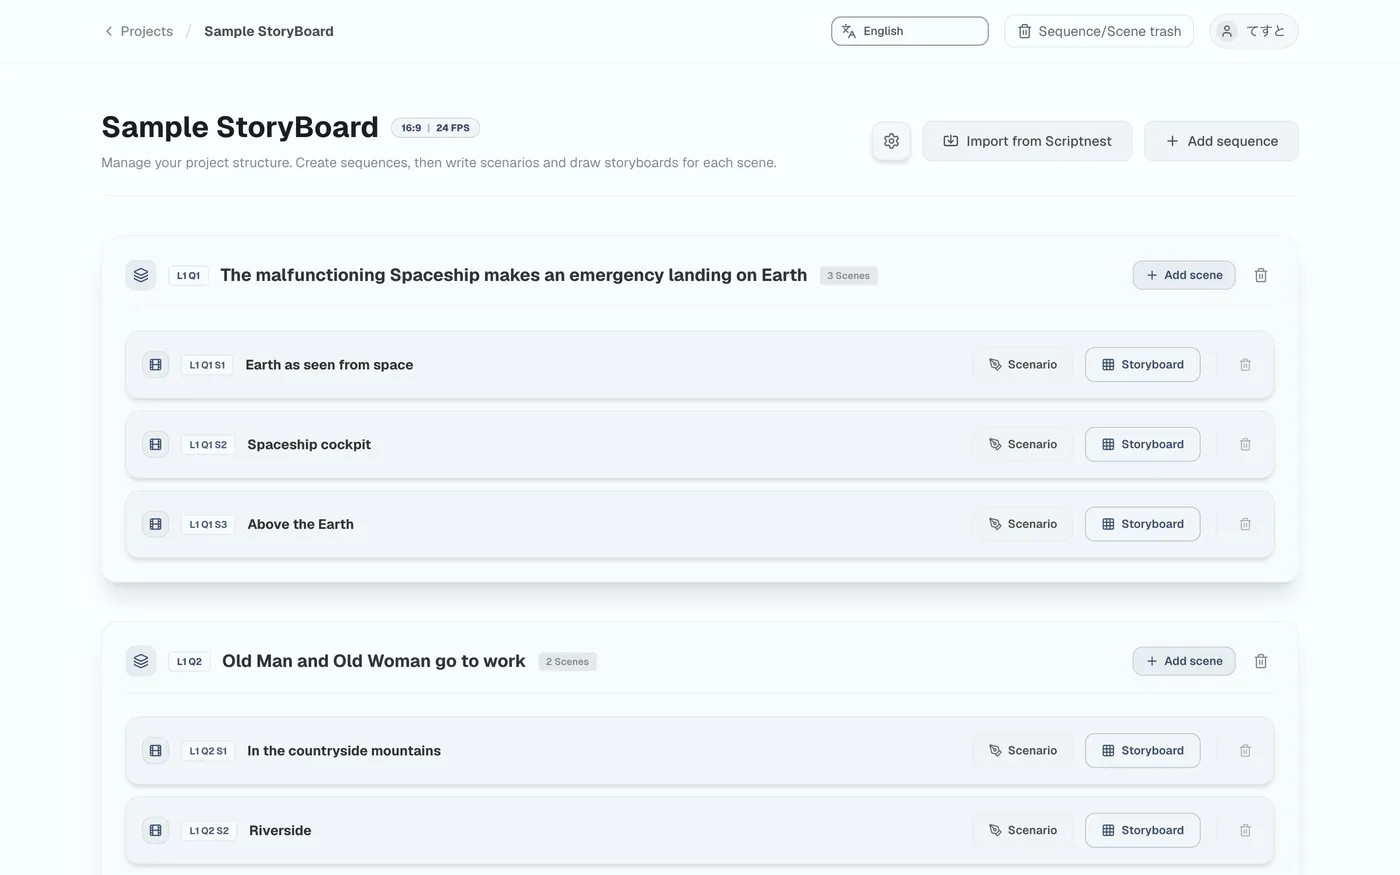
Figure 1.8: Imported line structure

2Scenario Editor: Structuring Text into Visuals

In the scenario editor, you can flexibly edit and structure your text as a “blueprint for the footage.”

Basic Editor Operations and Text Import

Entering the Scenario Editor#

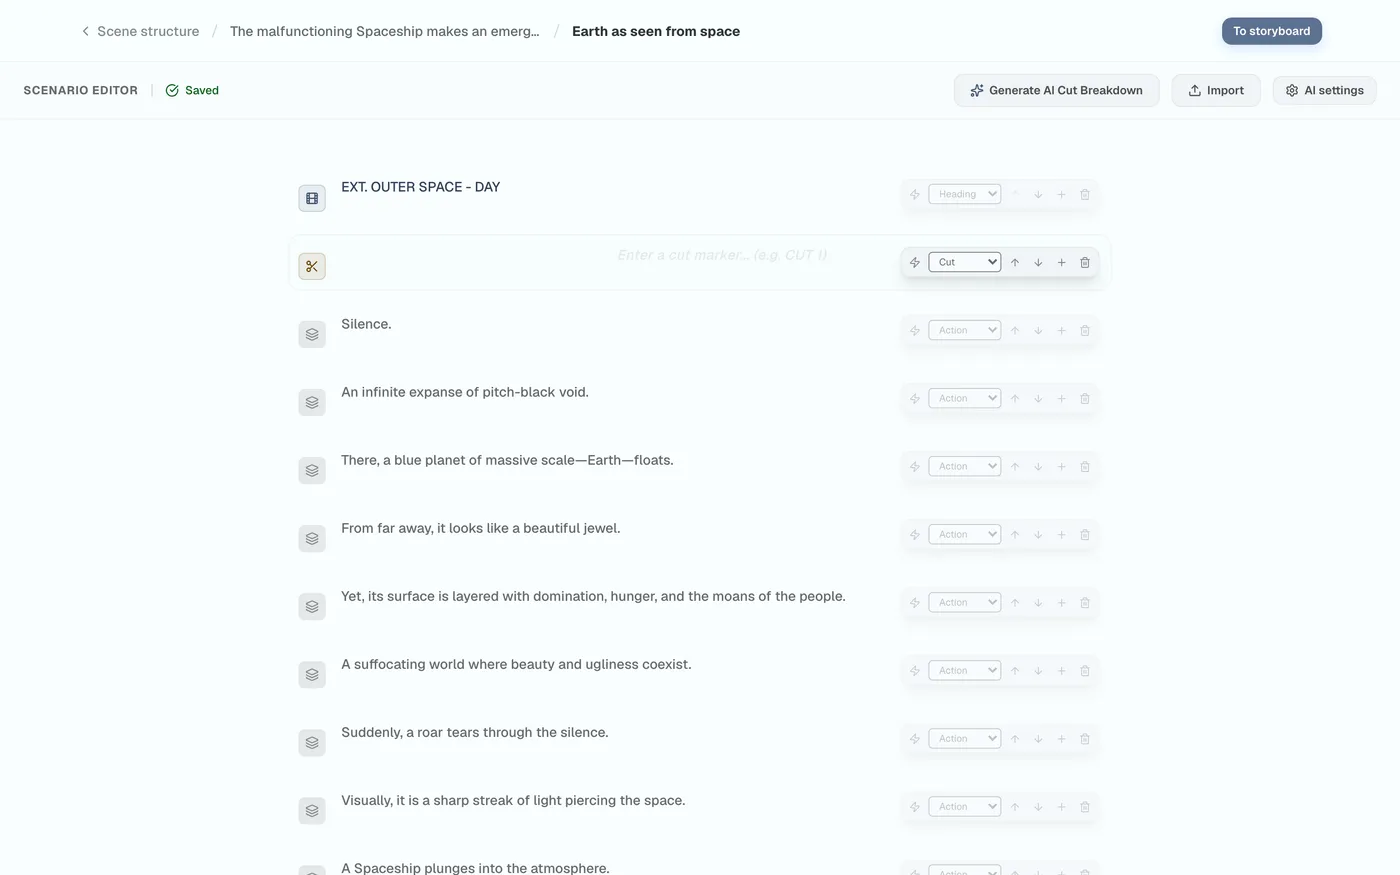
Press the scene's “Scenario” button to open the editor.
Figure 2.1: Navigating to the scenario editor
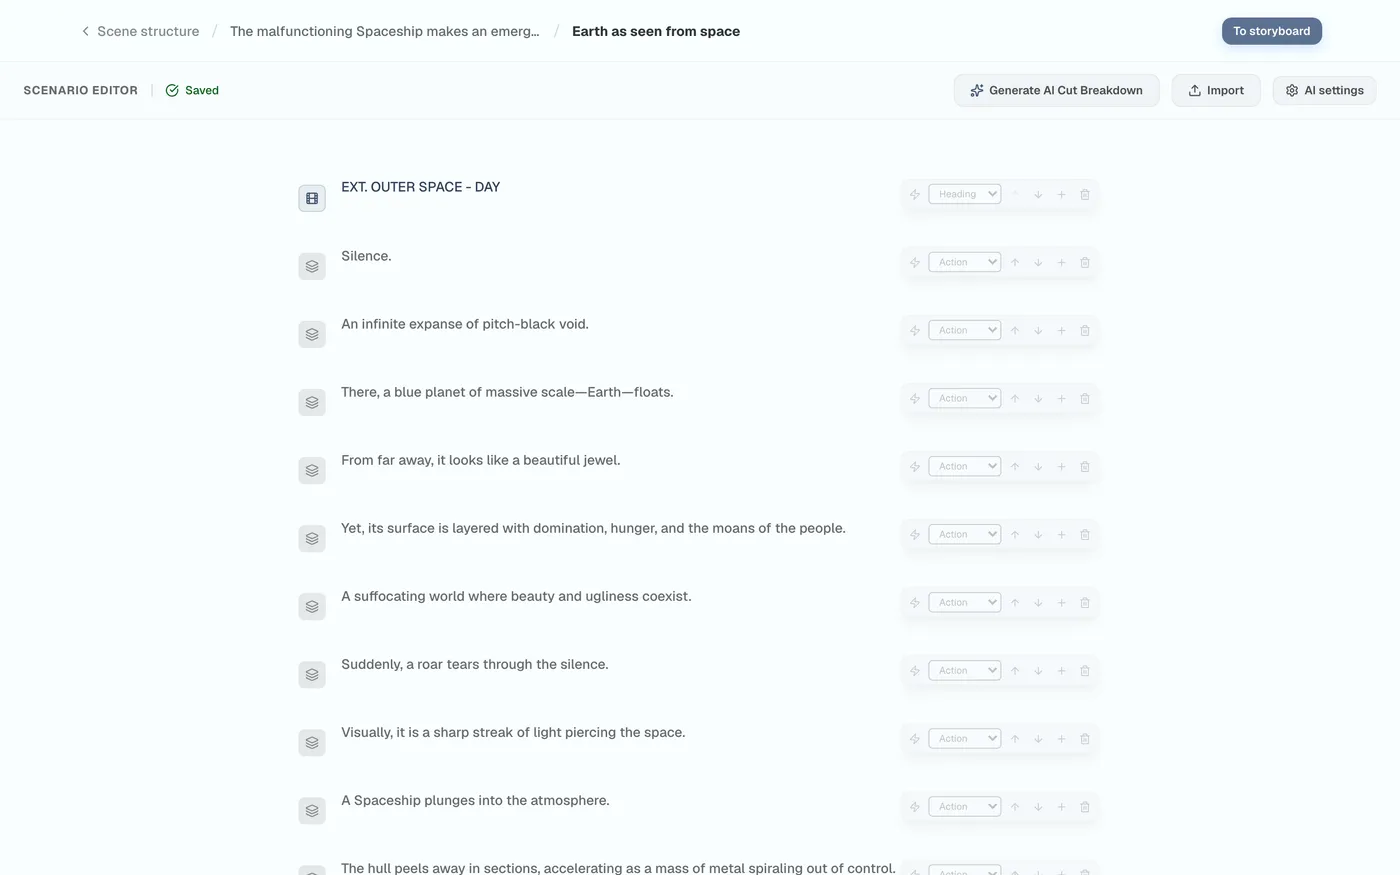
Figure 2.2: Scenario editor screen

Row Editing Tools and Attribute Changes#

Using the tools on the right, you can add or delete rows, reorder them up and down, and change attributes such as heading/action/dialogue.
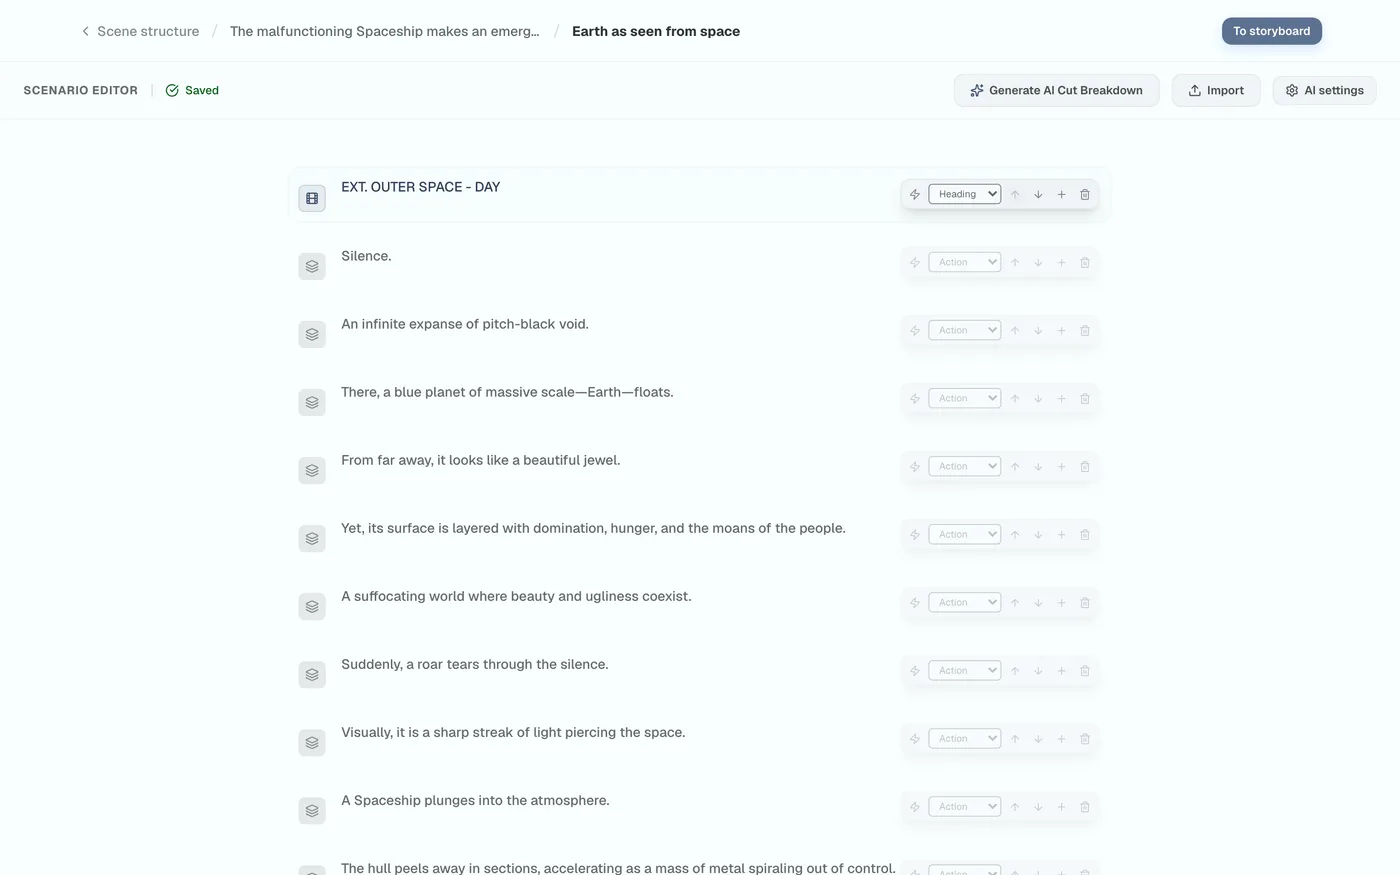
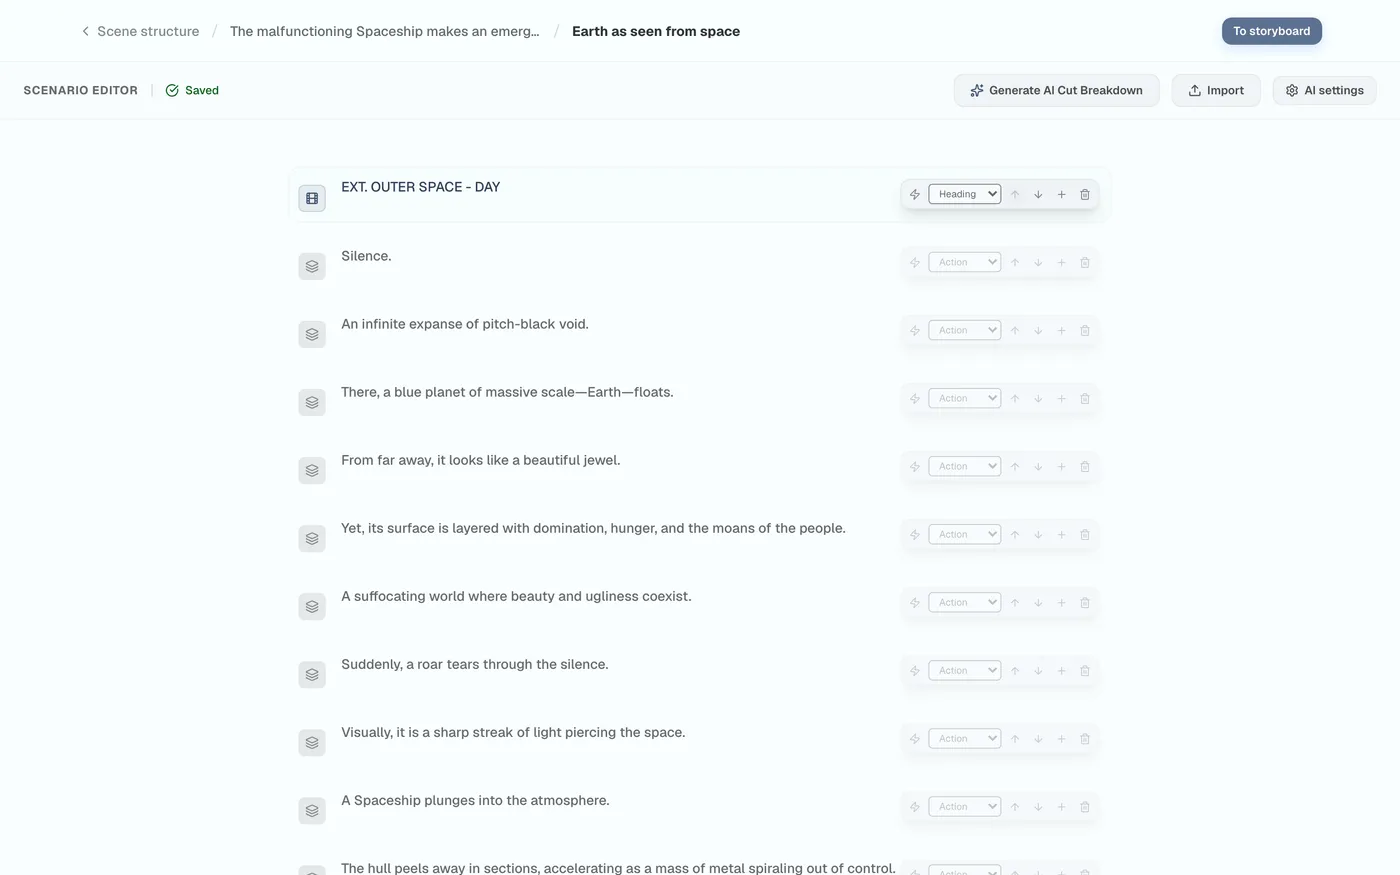
Figure 2.3: Adding, deleting, and reordering rows
Figure 2.4: Row attribute change menu

Importing an External File#

Supports loading plain text (.txt) and the Western-standard Fountain (.fountain) format.
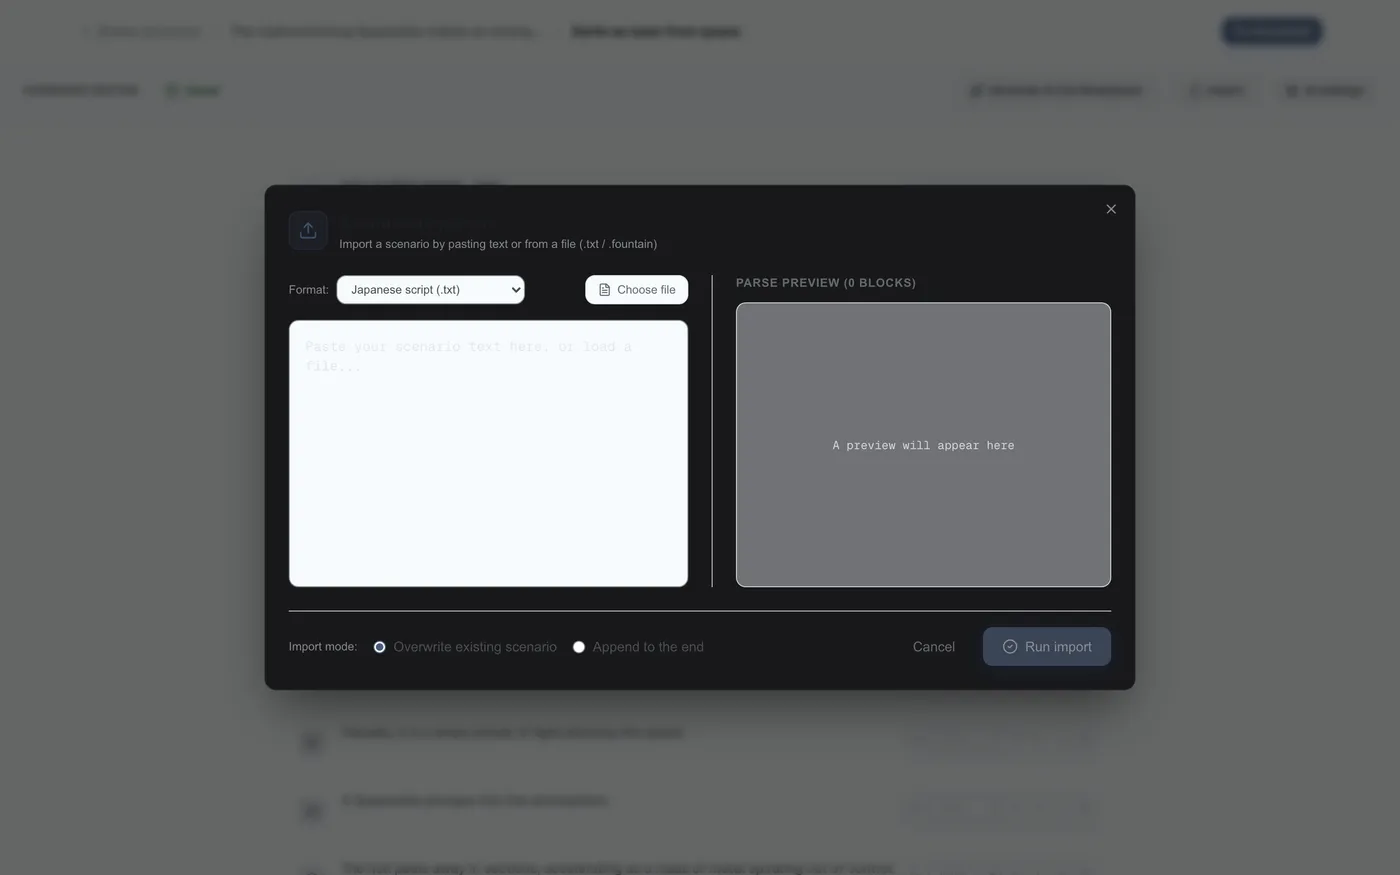
Figure 2.5: Loading an external scenario file

Splitting into Cuts (Manual and AI-Automatic)

Manually Splitting Cuts#

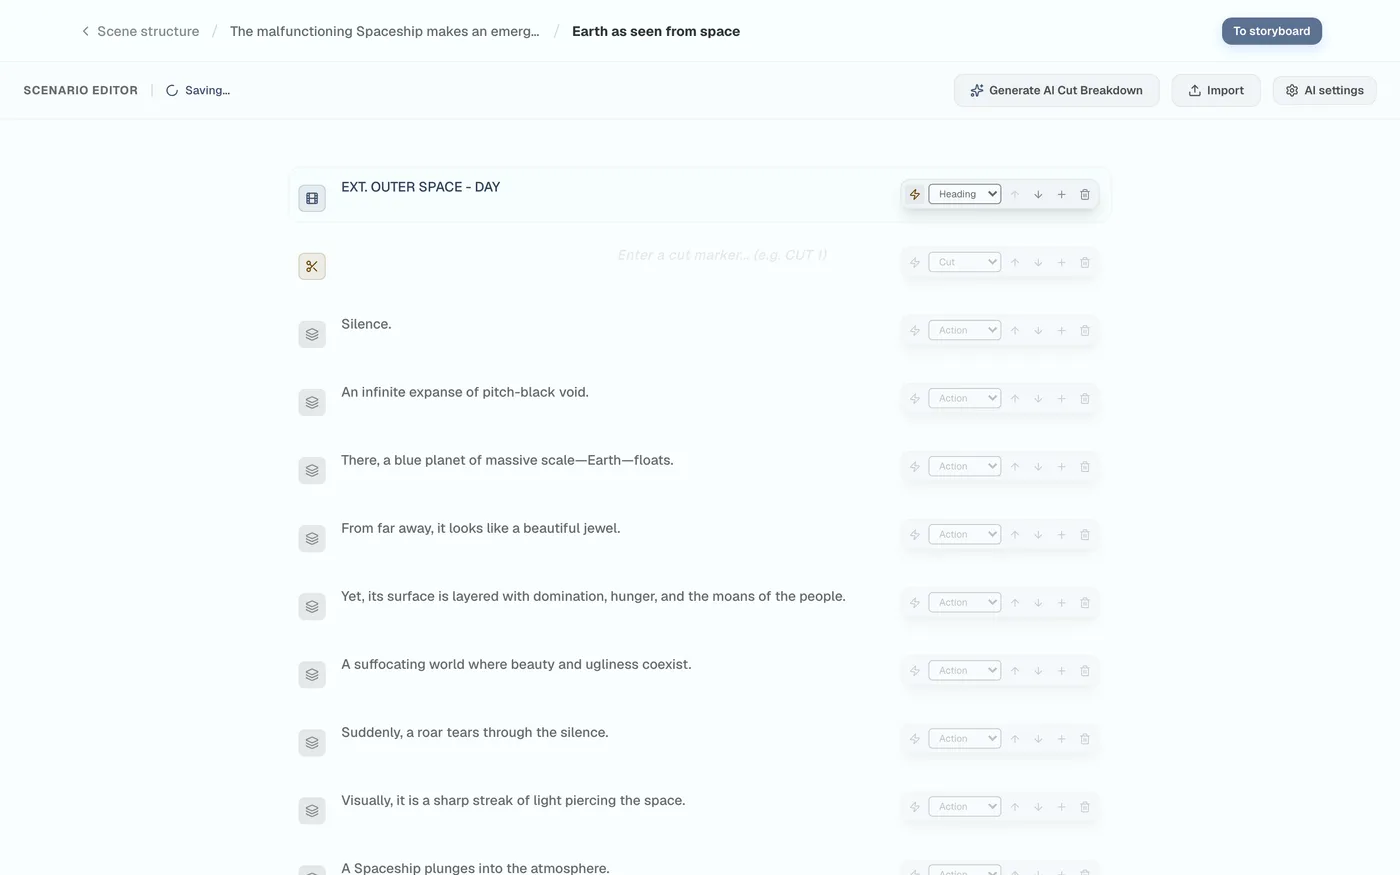
Press the lightning-bolt mark to insert a cut at any point you choose.

Figure 2.6: Splitting cuts with the lightning-bolt mark
Figure 2.7: Inserting a cut at any position
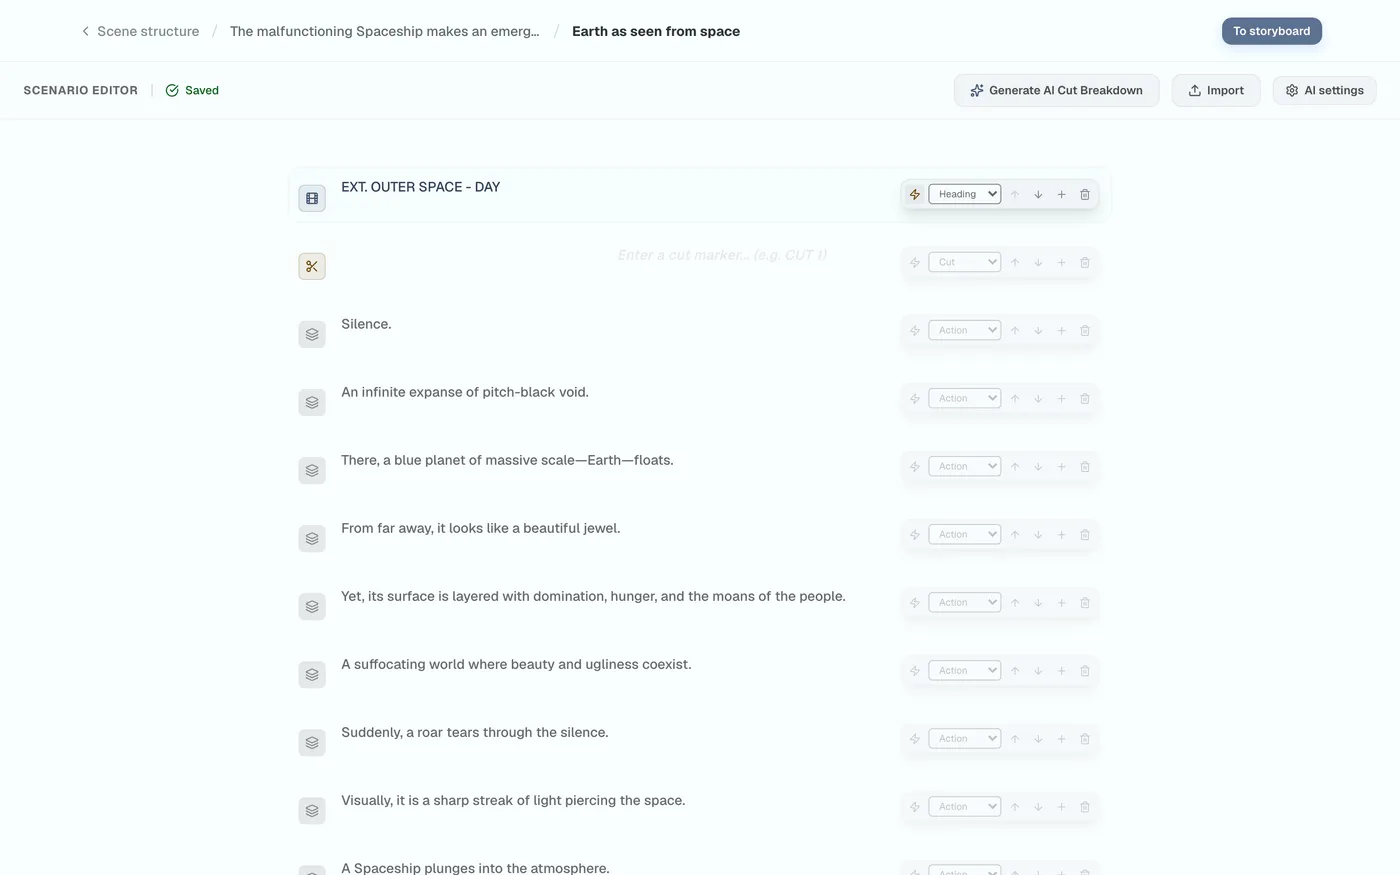
Figure 2.8: Cut-splitting setup complete

AI Settings and Cut-Split Generation#

Connect an API (Gemini/ChatGPT/Claude, etc.) or a local LLM to get AI-generated cut-split suggestions.
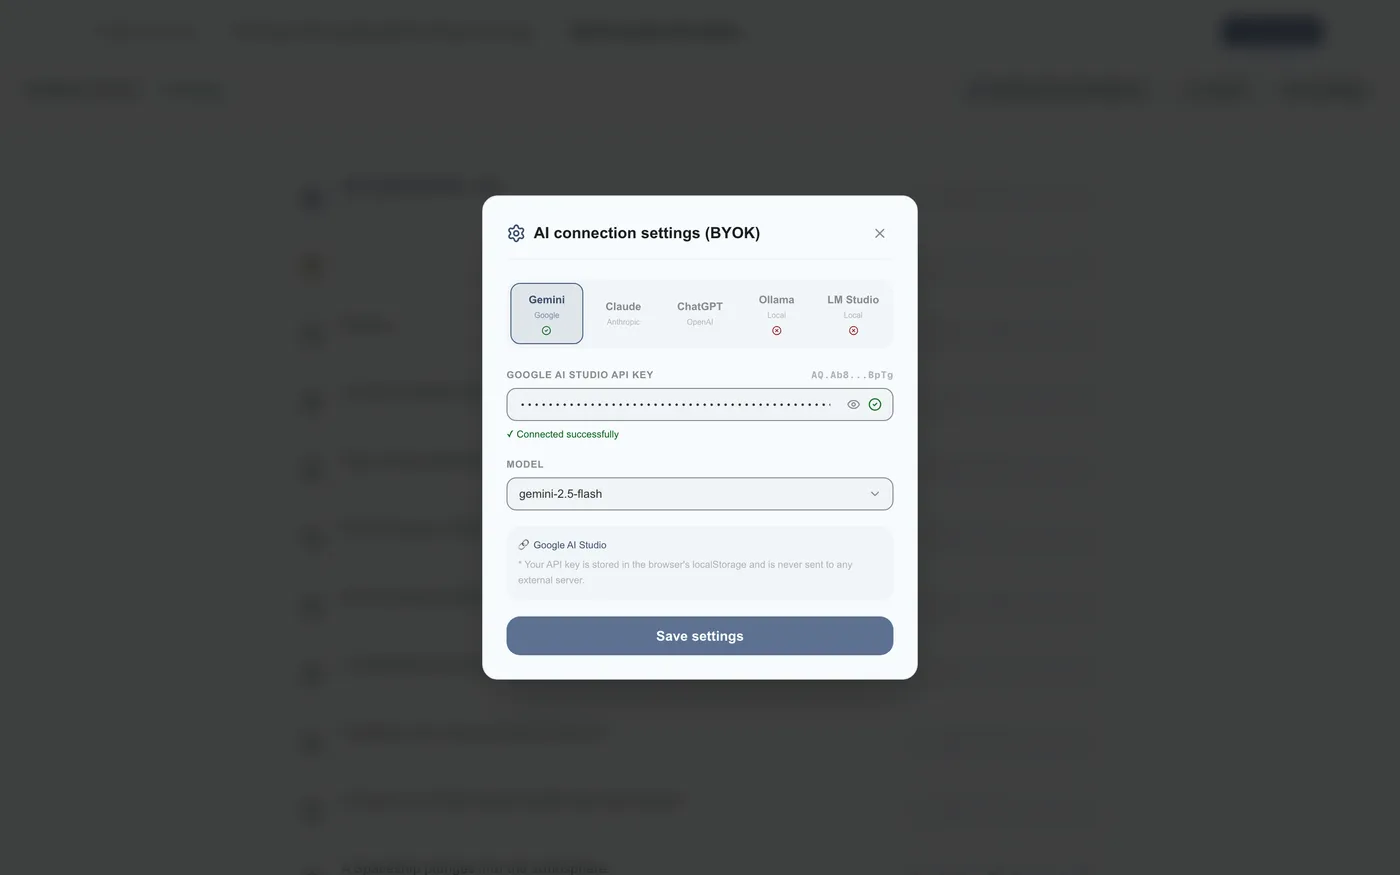
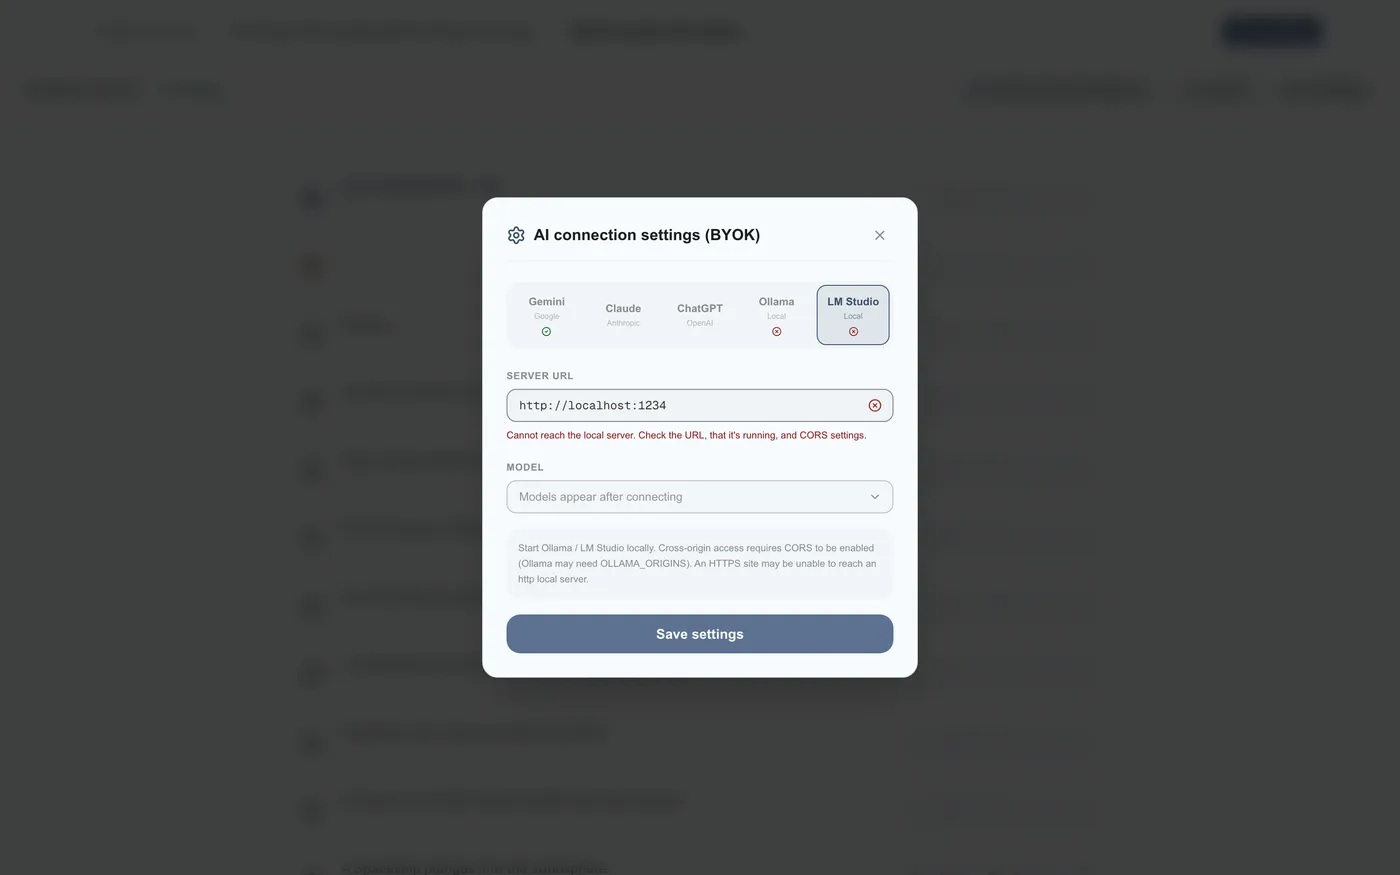
Figure 2.9: AI settings dialog
Figure 2.10: Configuring a variety of connectable LLM models
Figure 2.11: Starting AI cut-split generation
Figure 2.12: AI analyzing the screenplay

Selecting and Applying a Proposal#

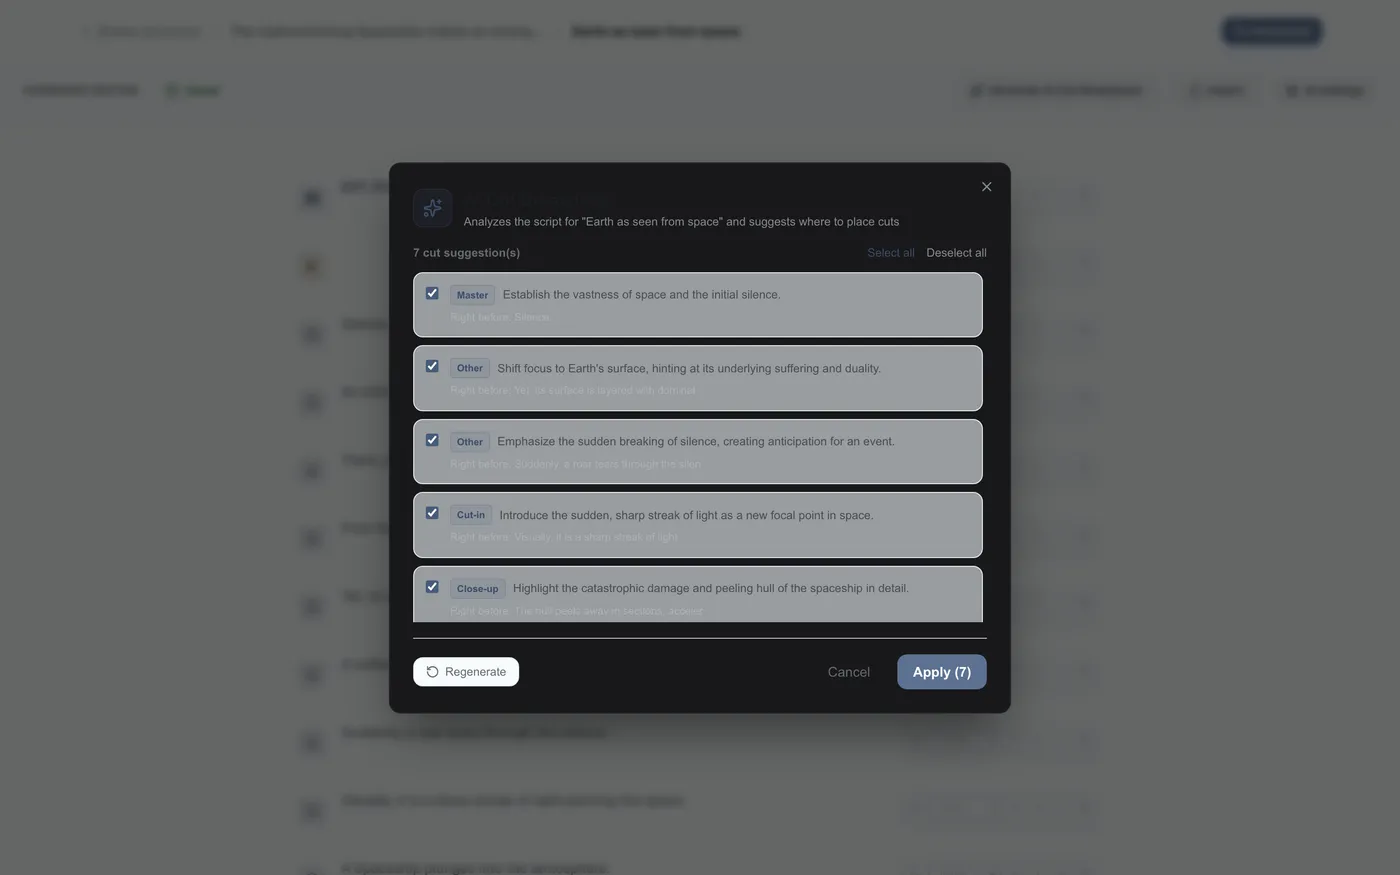
Select from the optimal cut candidates the AI proposed by analyzing the scene context, then apply them.
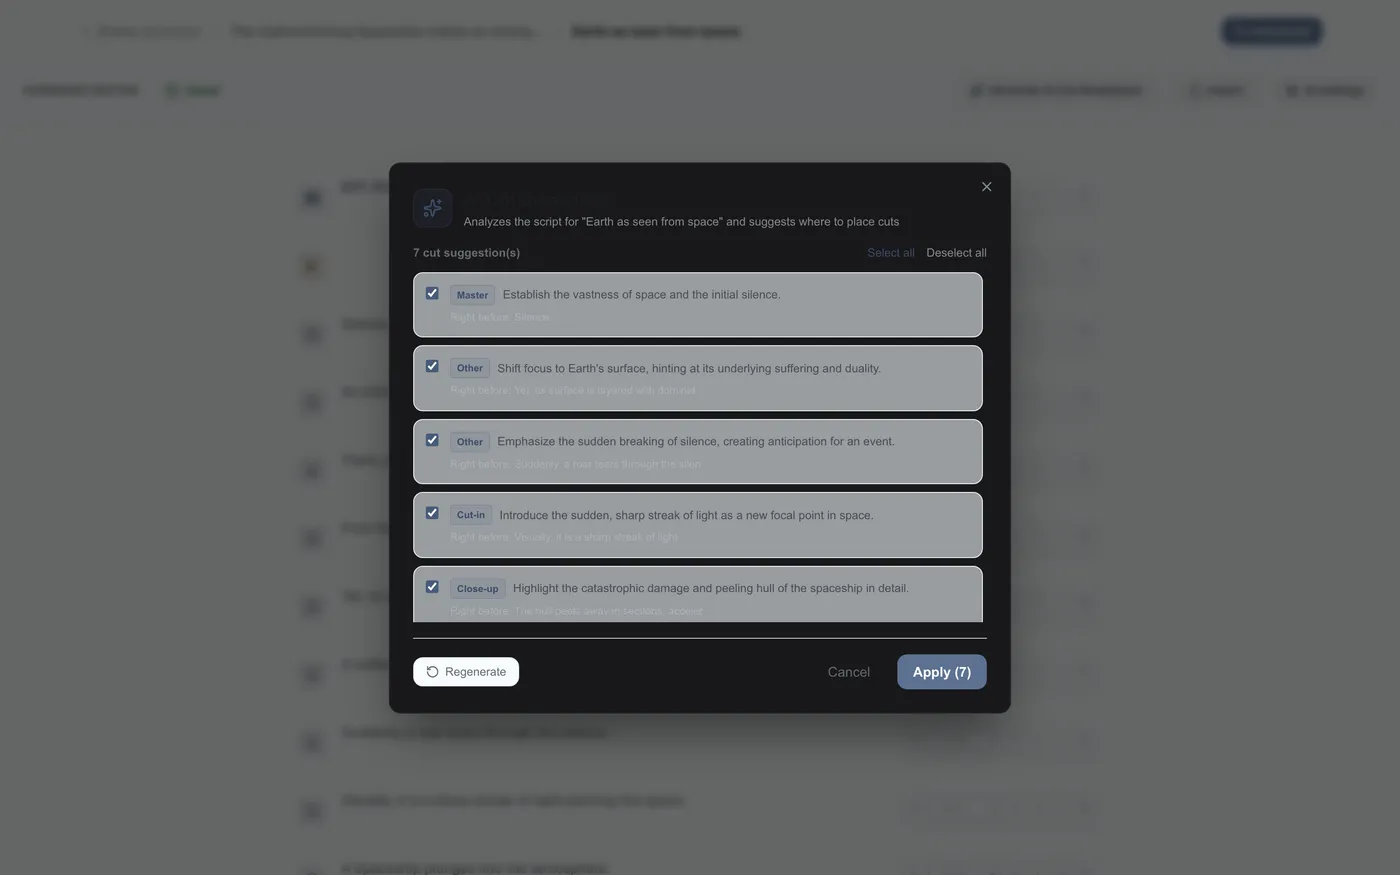
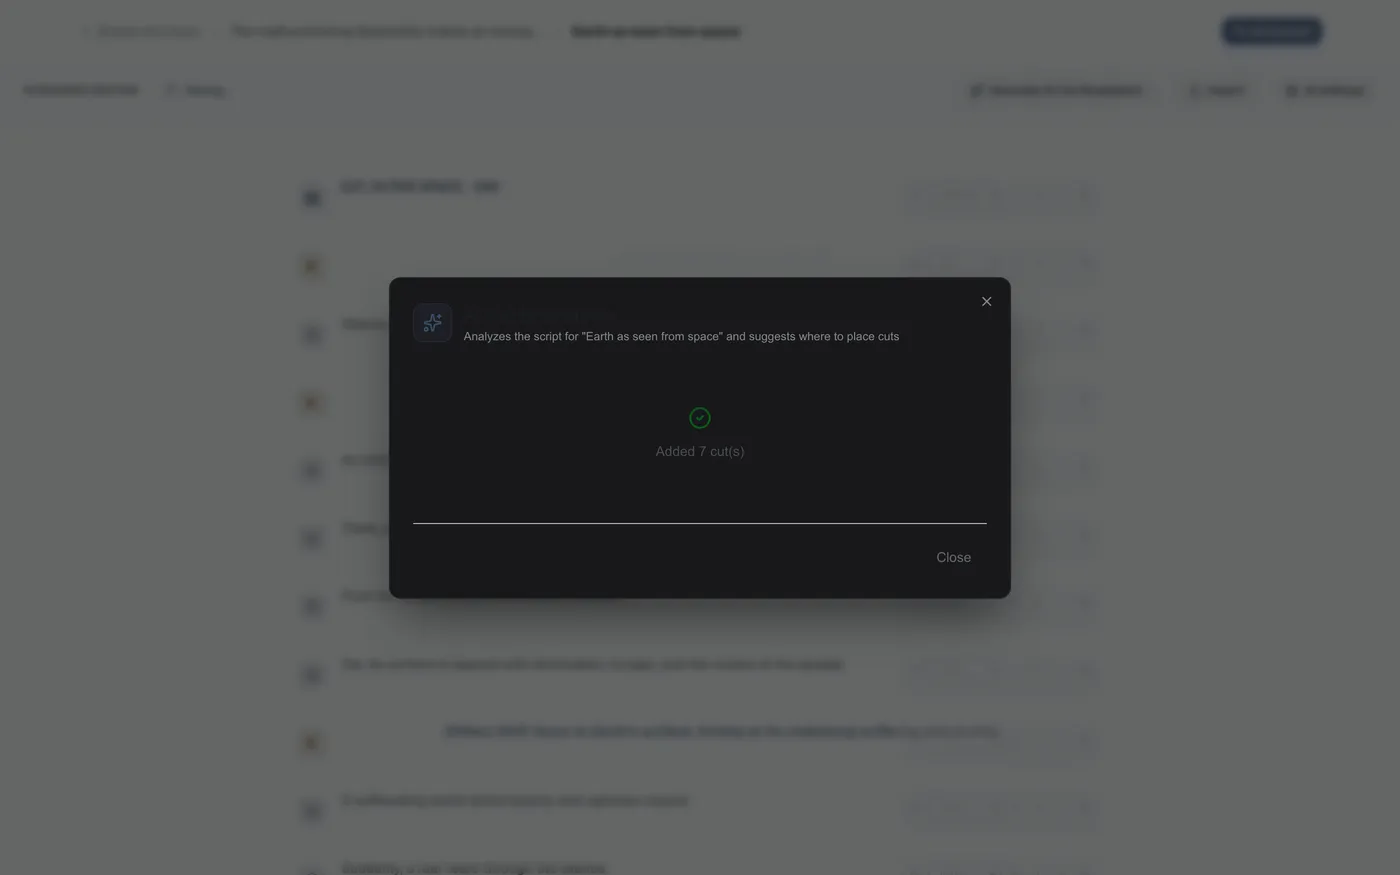
Figure 2.13: Selecting the AI's cut proposal
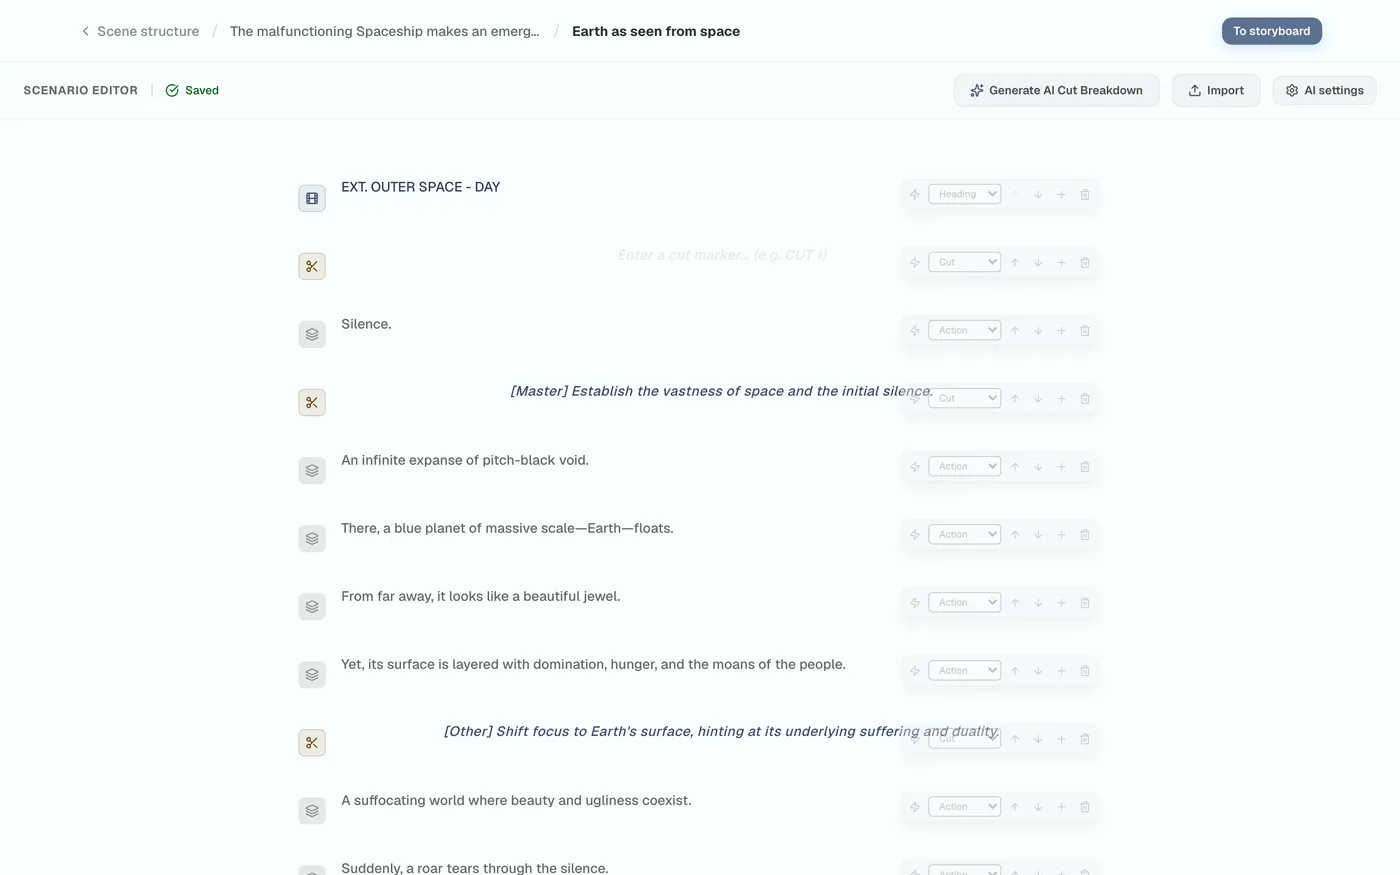
Figure 2.14: Applying the proposal
Figure 2.15: AI cut-split application complete

3Storyboard Management and Using “Smart Sync”

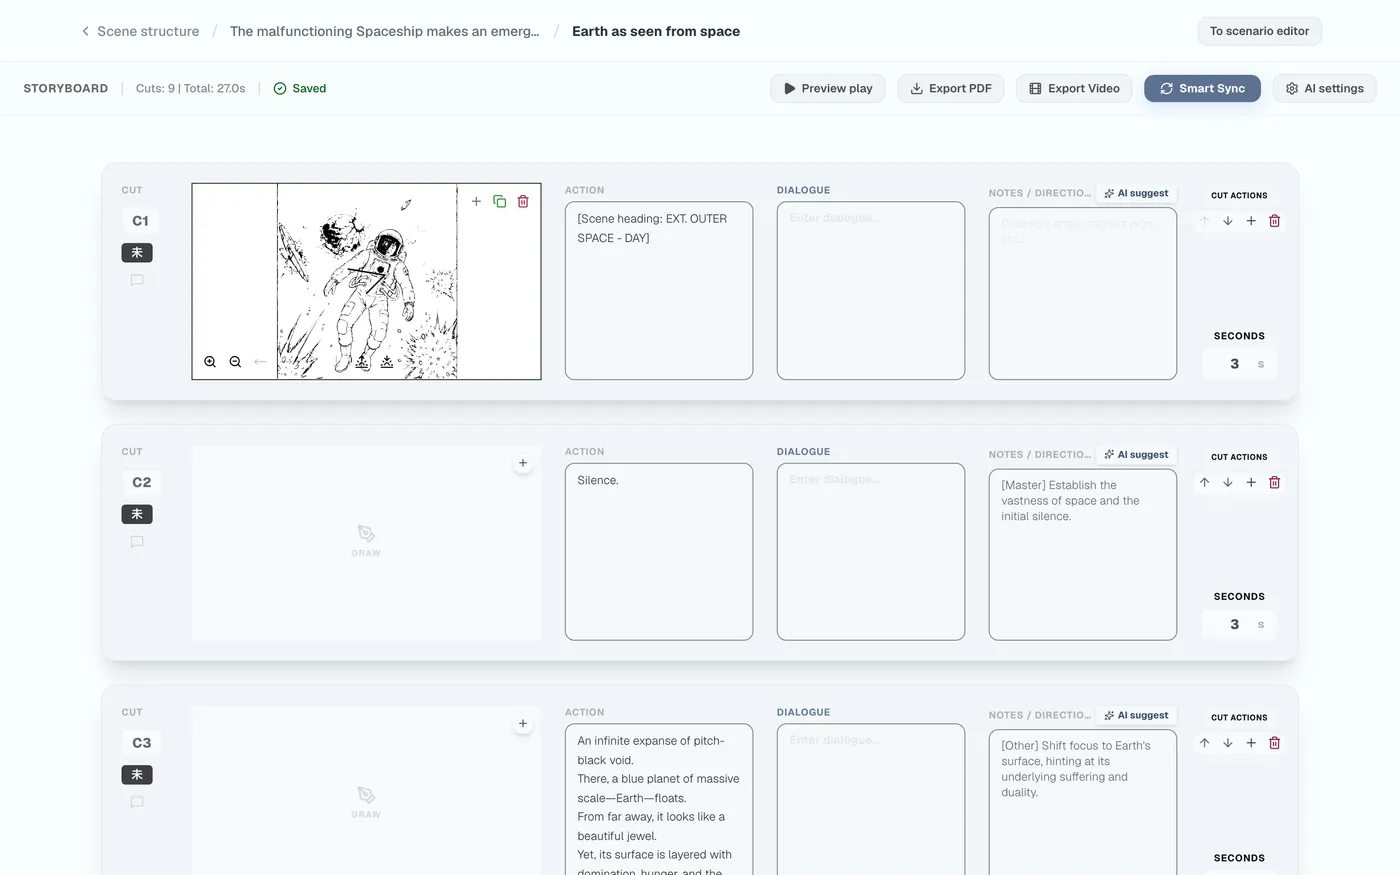
The “Smart Sync” feature instantly syncs screenplay changes to your artwork data, eliminating manual rearrangement.

Smart Sync and Moving to the Storyboard Screen

Moving to the Storyboard#

Press “To Storyboard” to switch screens.
Figure 3.1: Moving to the storyboard screen

Running Smart Sync#

Pressing “Smart Sync” automatically generates artwork frames (panels) based on the screenplay's cut breakdown.
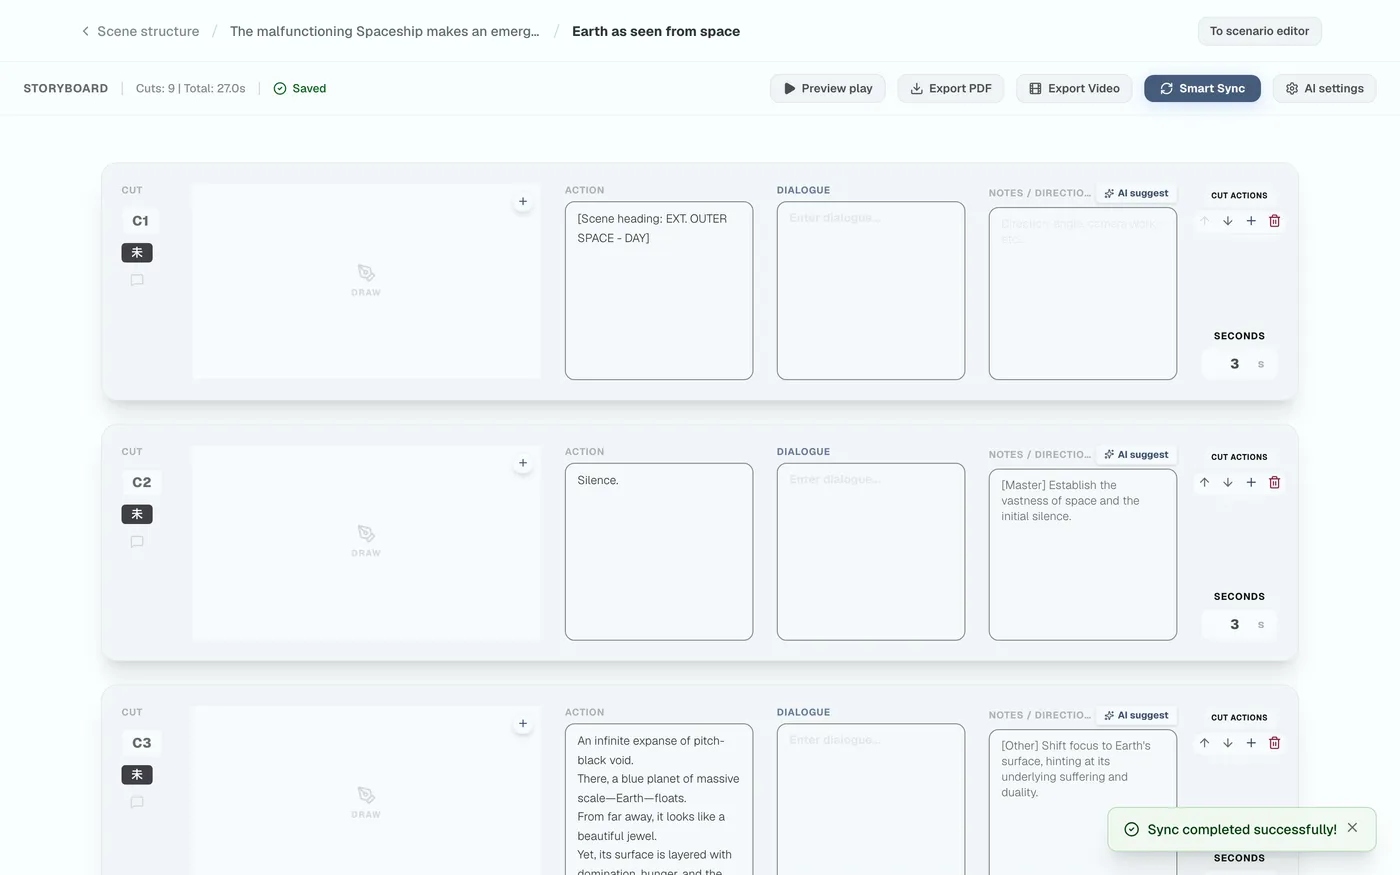
Figure 3.2: Running Smart Sync
Figure 3.3: List of synced cut panels

Detailed Editing on the Cut Board

Cut Operations and Duration Settings#

Use the buttons on the right to reorder or delete cuts, and the seconds field below to set the cut's duration.
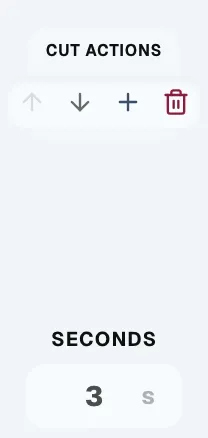
Figure 3.4: Reordering cuts and setting their duration

Status (Progress) Management#

On the left side of the cut board, you can visualize the production status of each cut.
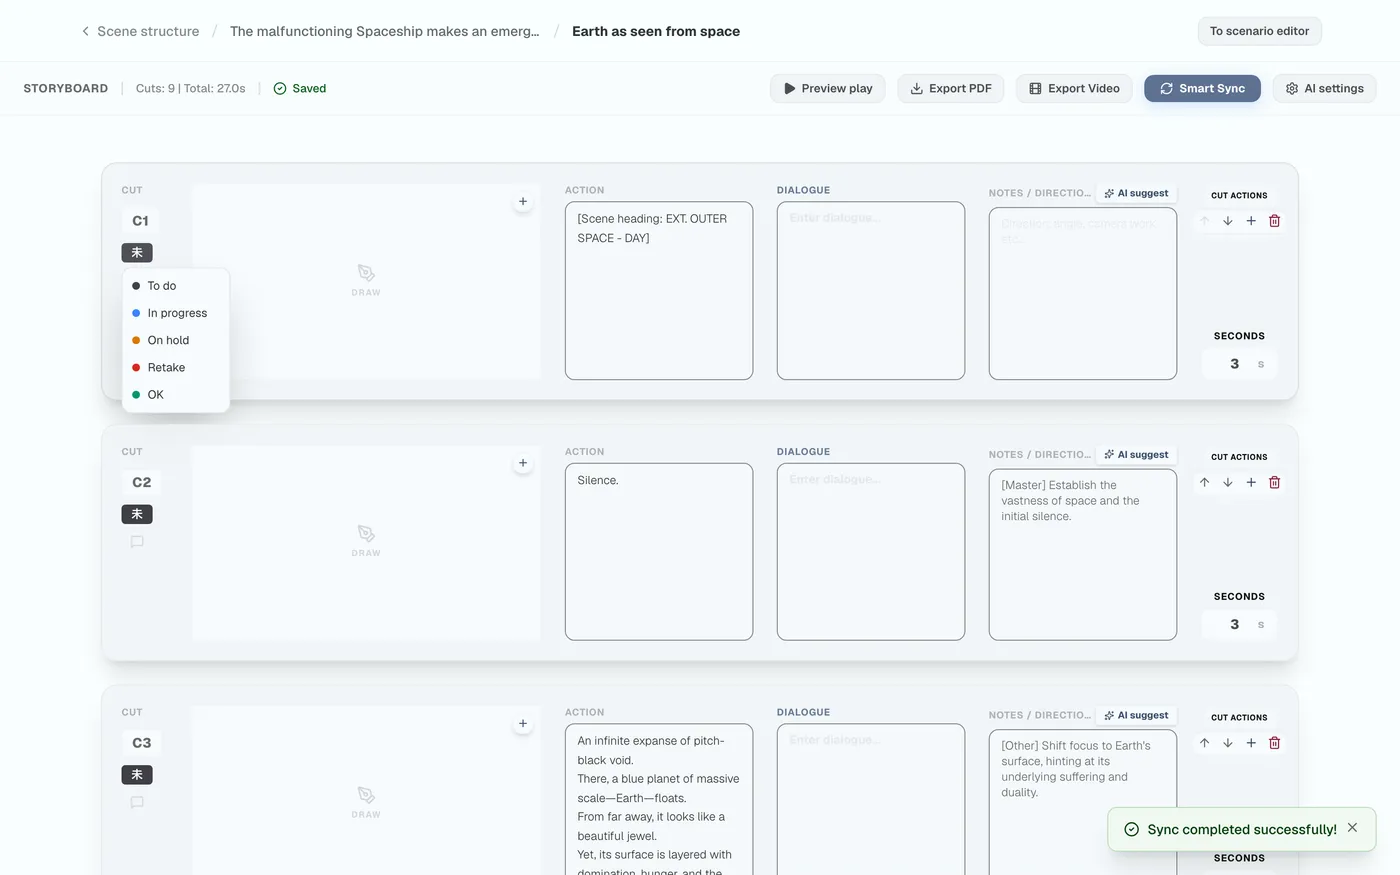
Figure 3.5: Cut progress status display

Directing Comment Feature#

Use the speech-bubble icon at the bottom left to enter directing notes for each cut.
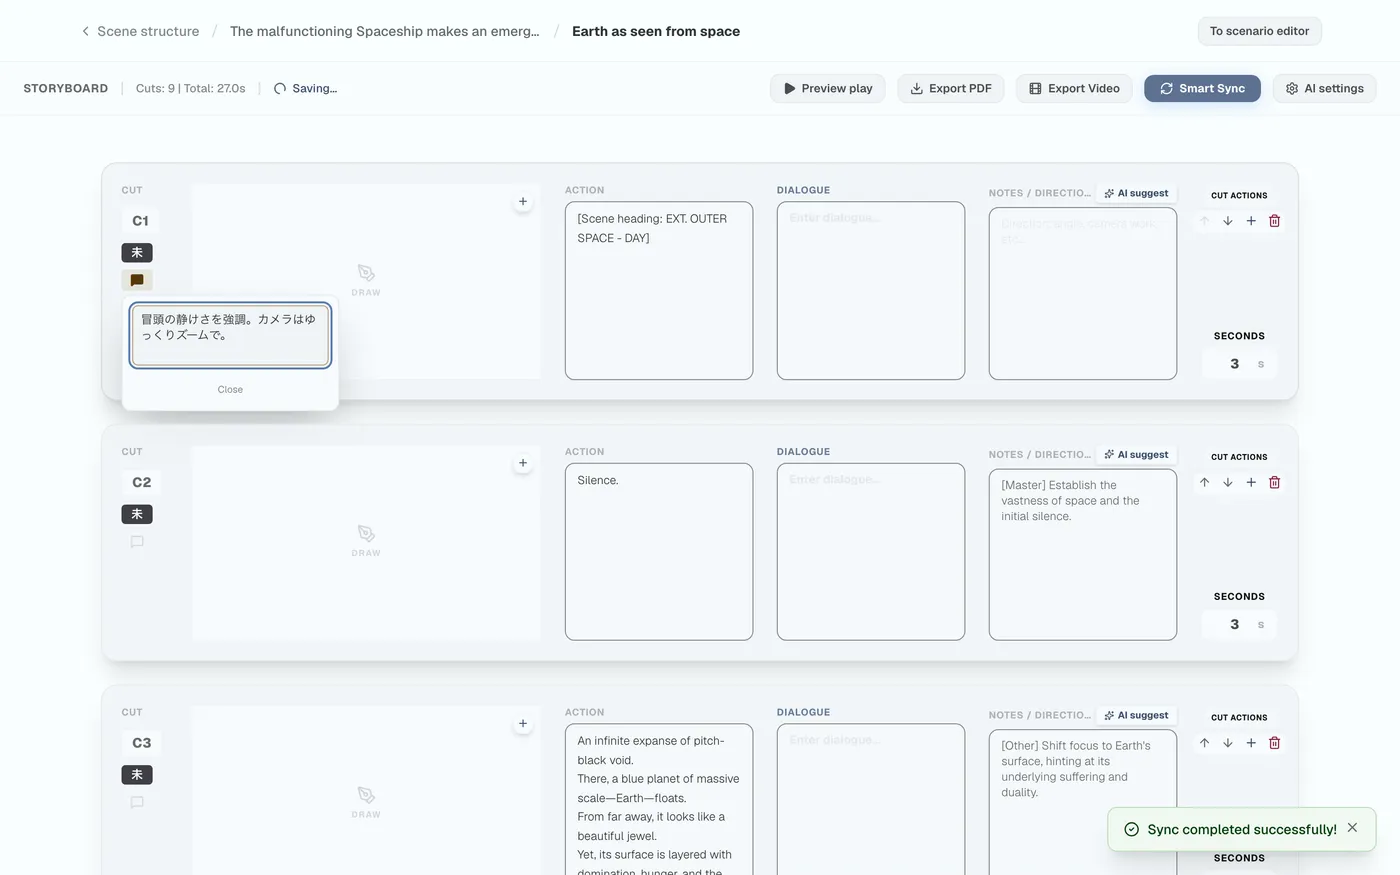
Figure 3.6: Entering a cut comment

4Drawing Canvas: Professional Vector Drawing

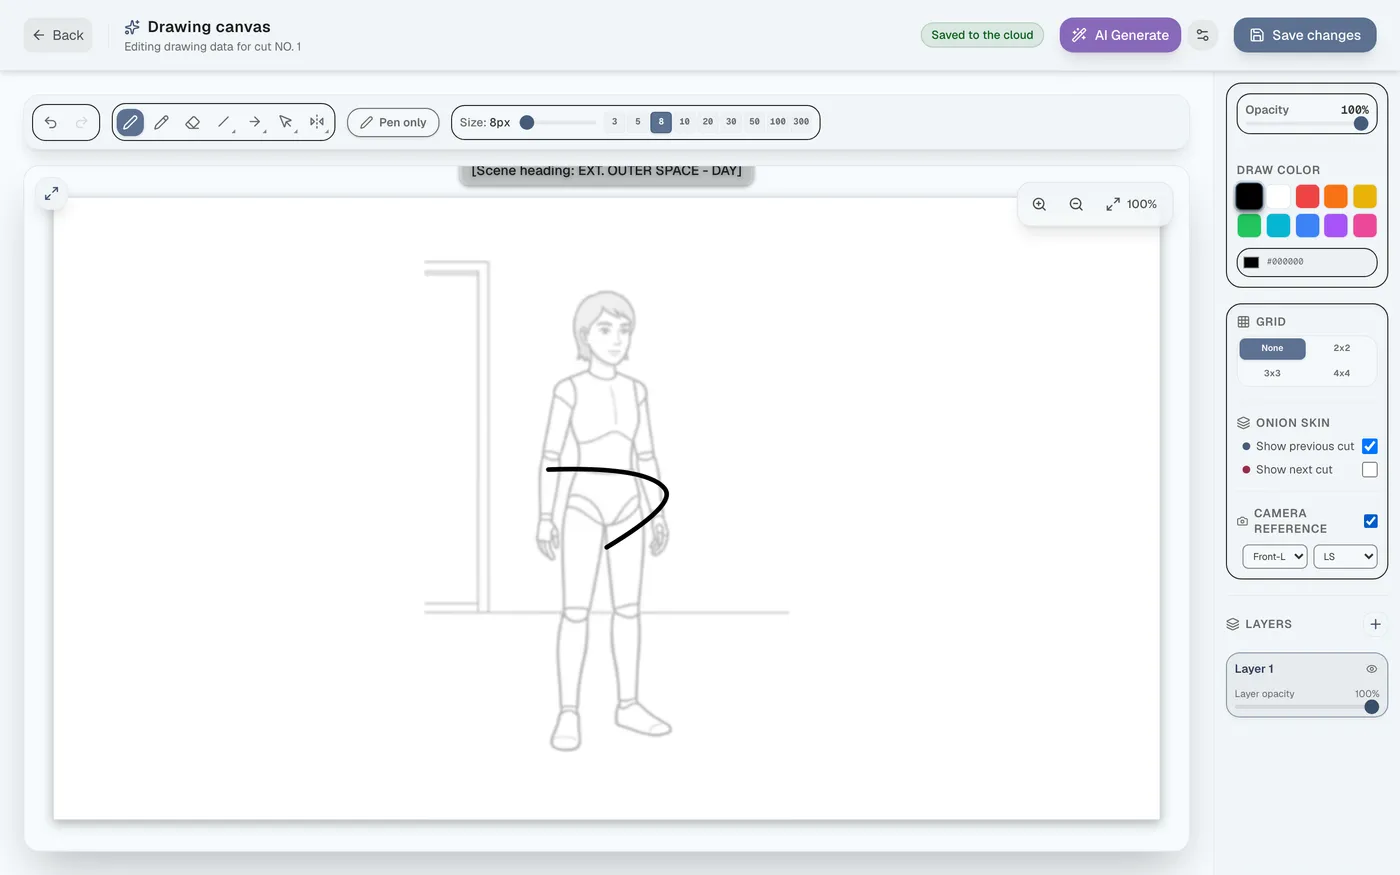
The vector-based drawing engine lets you draw crisp, high-quality lines that never degrade when zoomed, all with extremely lightweight data.

Drawing Tools and Workflow Support Features

Launching the Canvas and Drawing Tools#

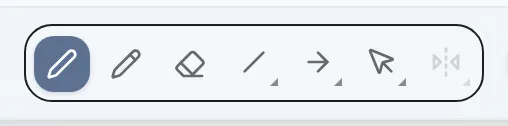
Press “Draw” to launch it. Pen, pencil, and thickness adjustment (presets/slider) are available.
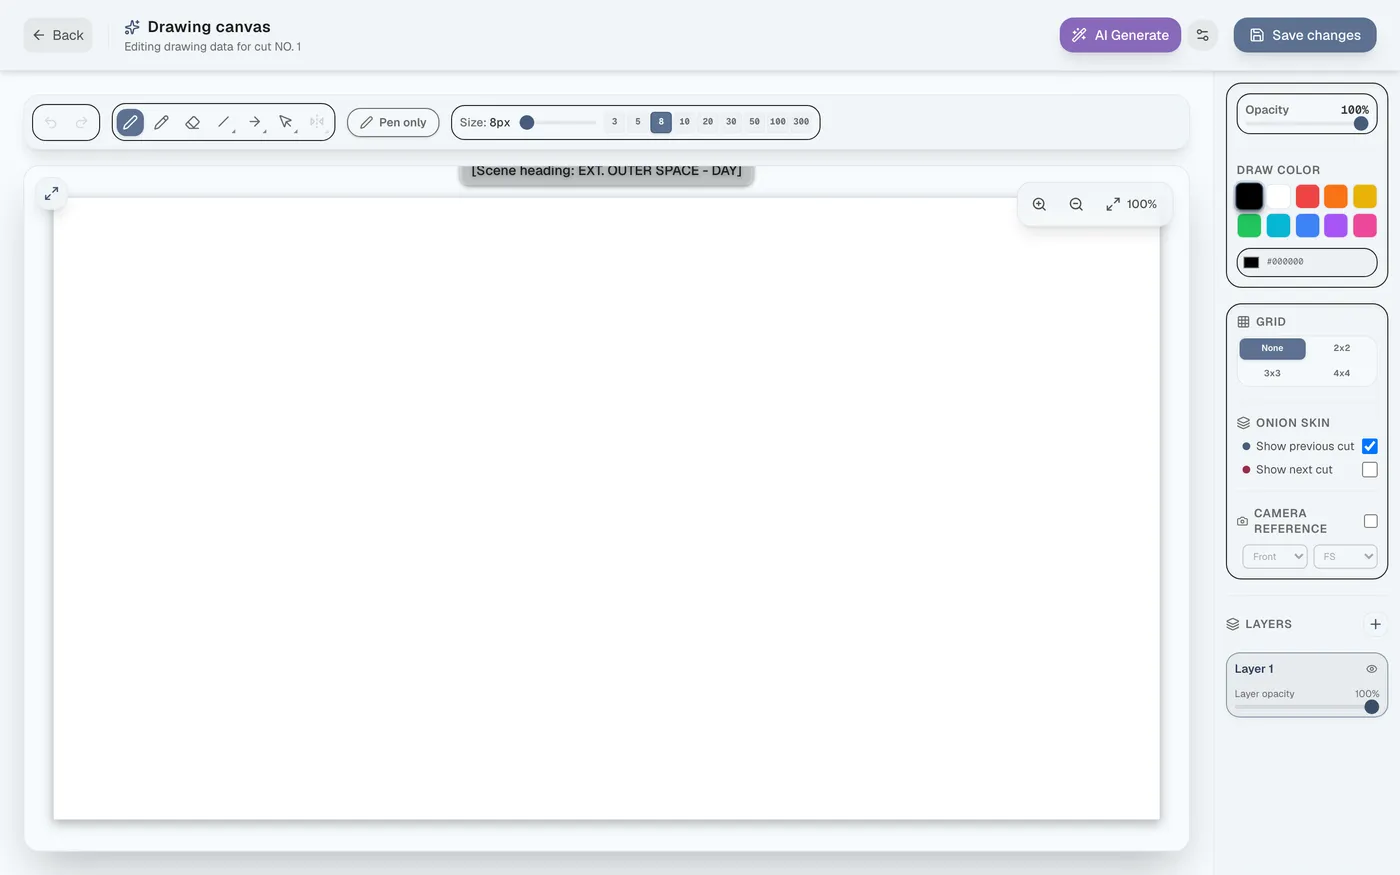
Figure 4.1: Launching the drawing canvas
Figure 4.2: Drawing tools
Figure 4.3: Adjusting pen thickness with the slider

Pen-Only Mode (Preventing Accidental Touches)#

When using a pen display, activate “Pen Only” to prevent accidental touches from your hand.
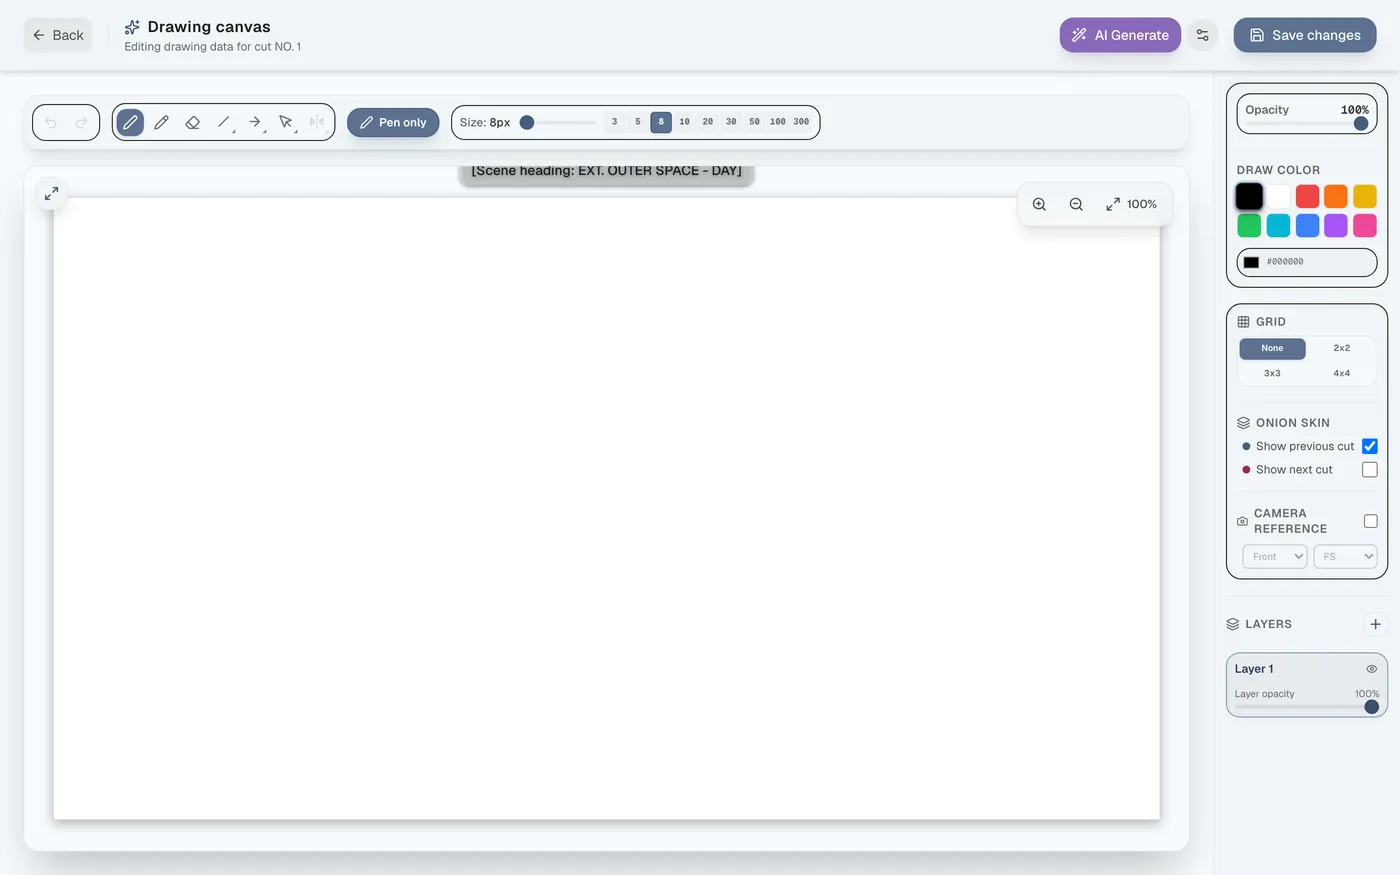
Figure 4.4: Enabling pen-only mode

Shape and 3D Arrow Drawing#

In addition to straight lines, circles, and rectangles, you can draw 3D arrows to indicate camera or subject movement.
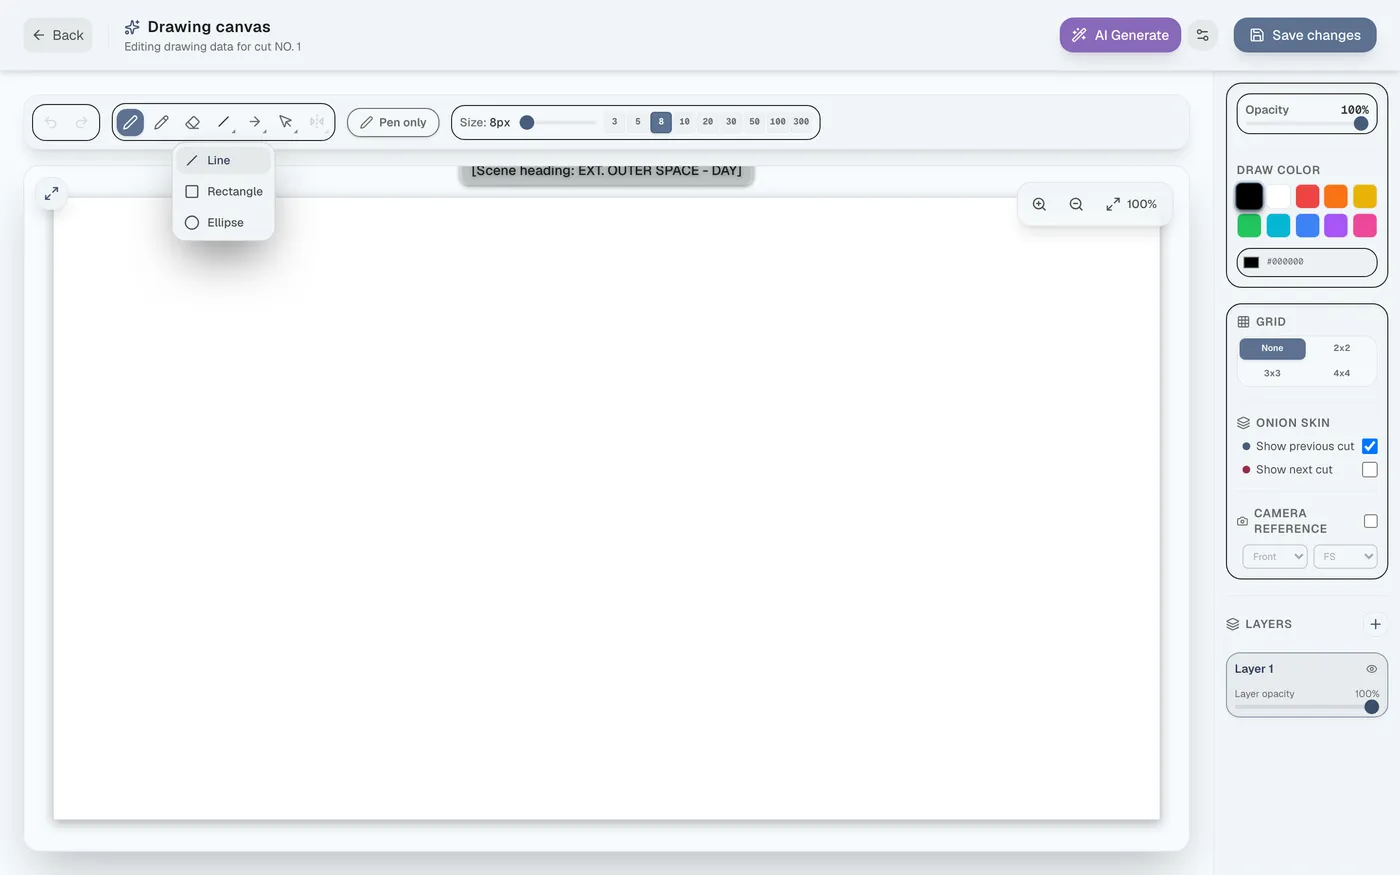
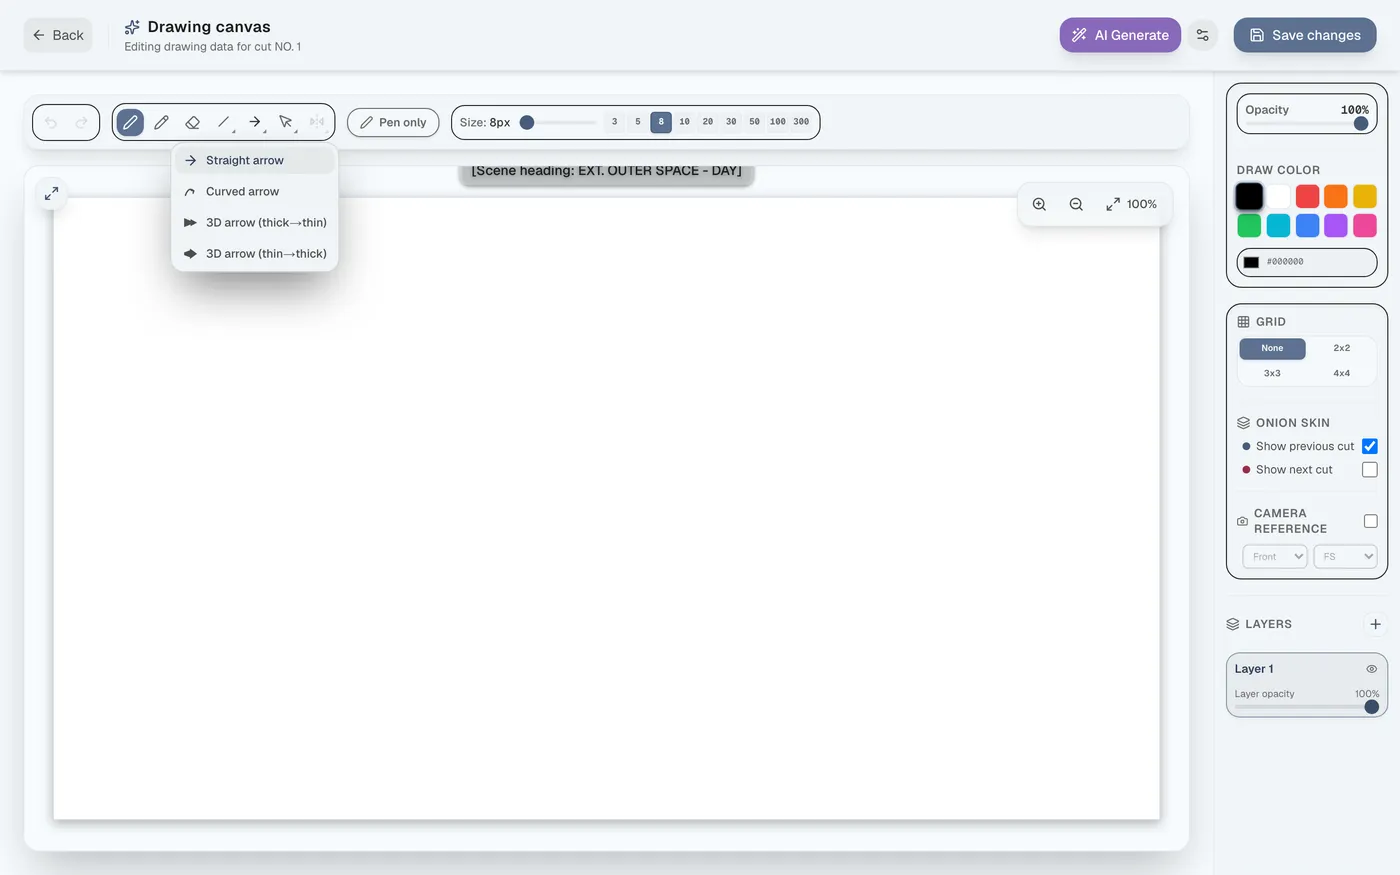
Figure 4.5: Line and shape drawing tools
Figure 4.6: 3D arrow tool for directing notes

Selection, Flipping, Color, and Onion Skin#

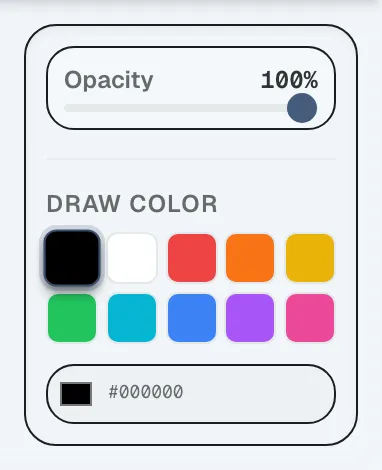
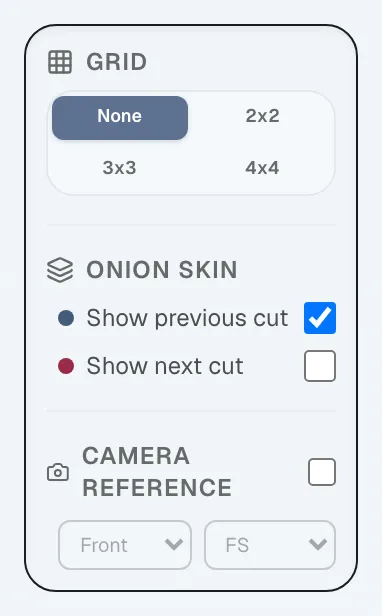
Supports selecting individual lines or lasso selection, flipping, color/opacity settings, and grid/onion-skin display.
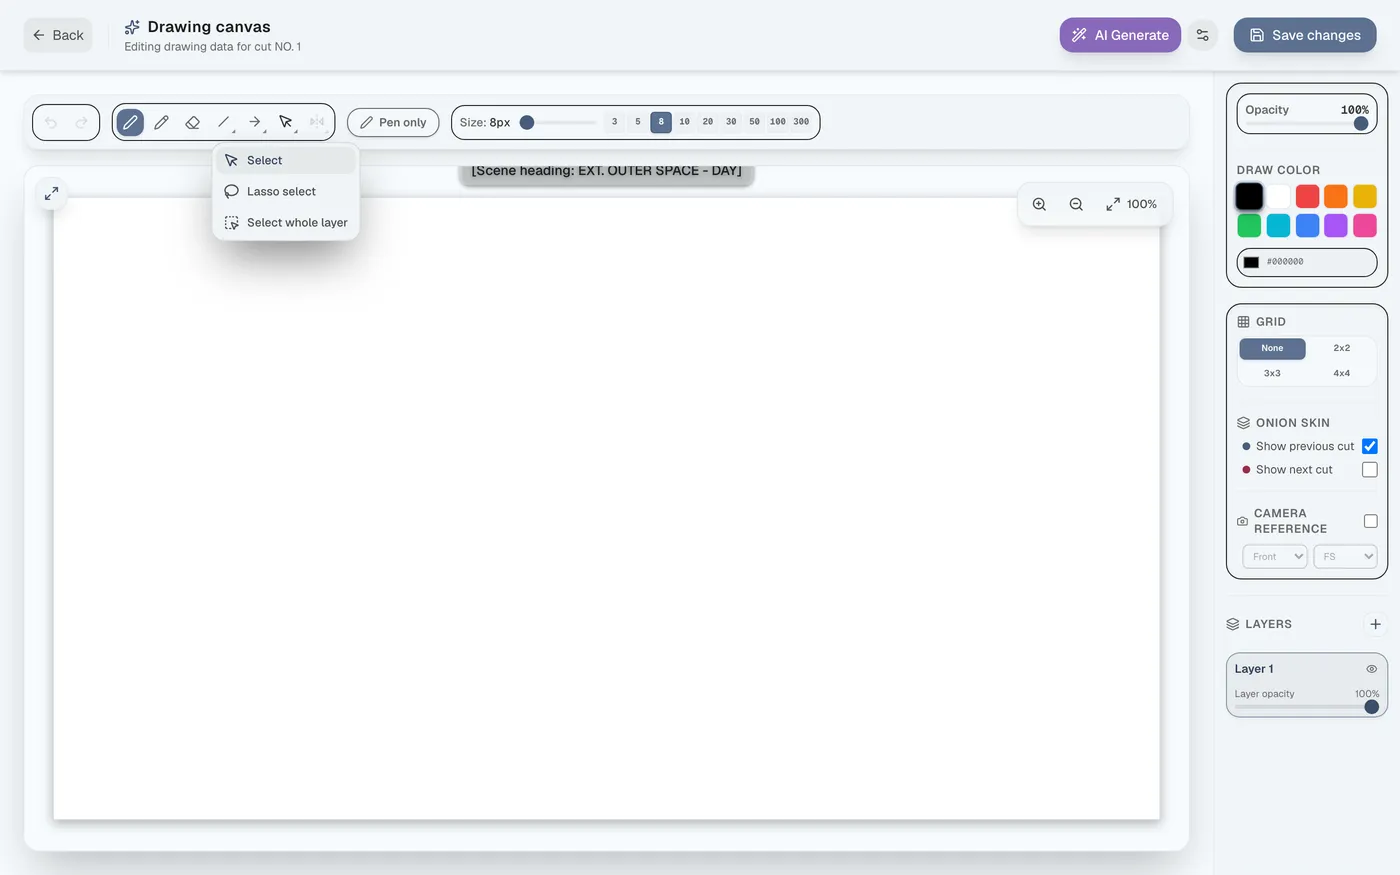
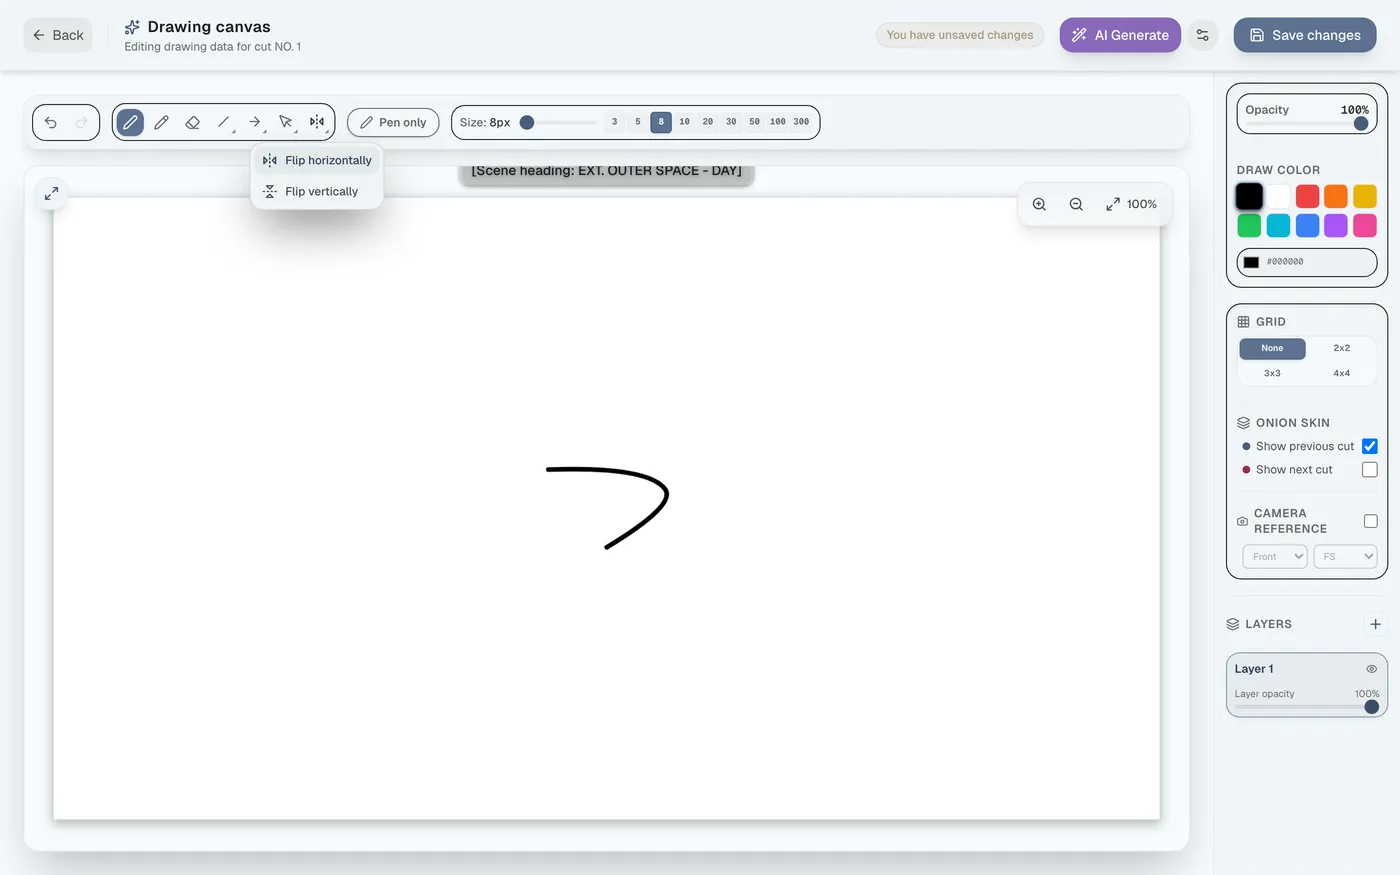
Figure 4.7: Various selection tools
Figure 4.8: Horizontal and vertical flip
Figure 4.9: Color palette and opacity settings
Figure 4.10: Grid and onion-skin display

Camera-Work Reference Display#

Displays a 3D guide on screen for shot size (8 levels such as Waist and CU) and angle (in 45° increments), so you can trace over it.
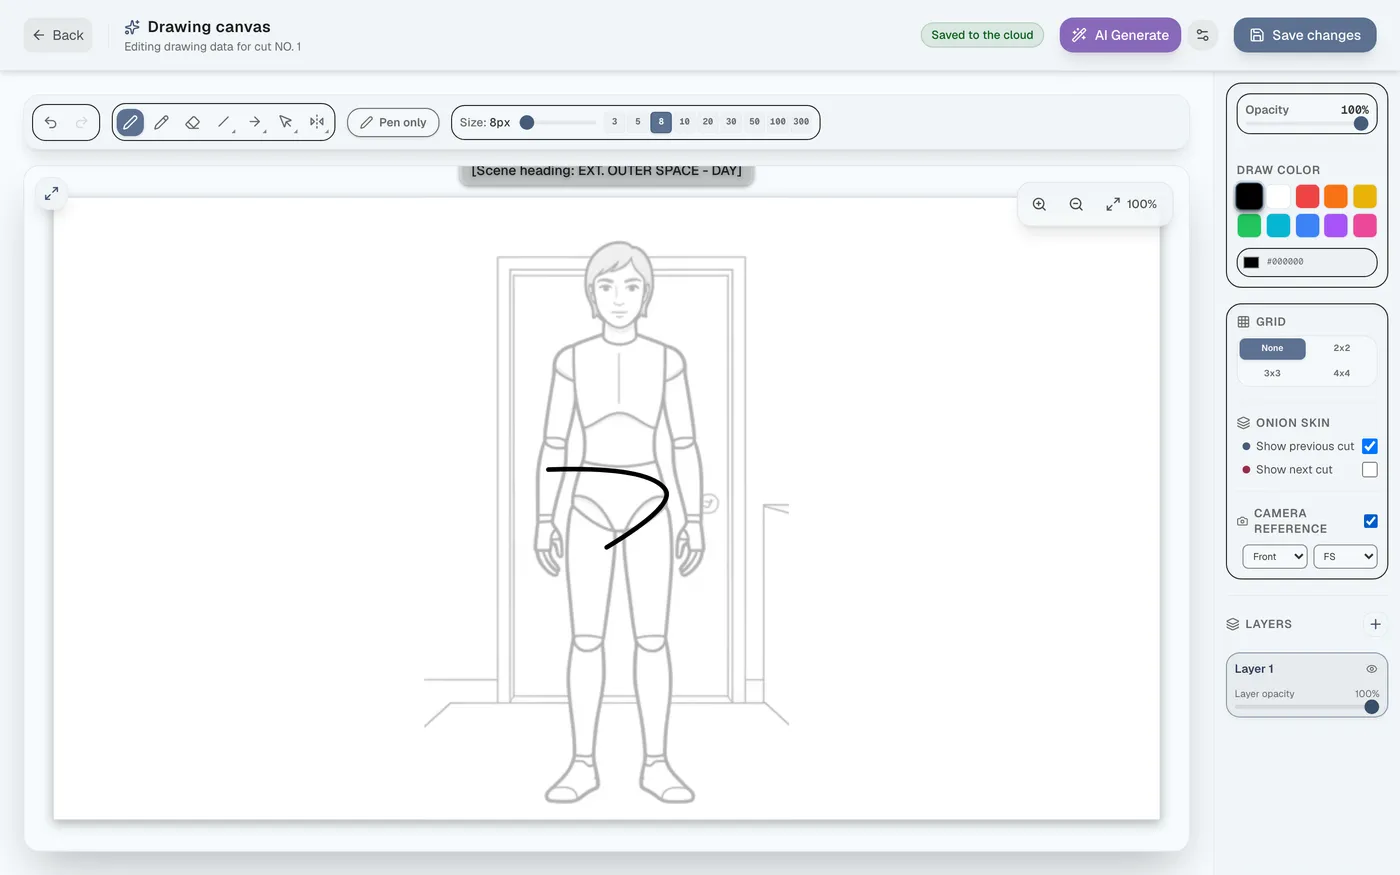
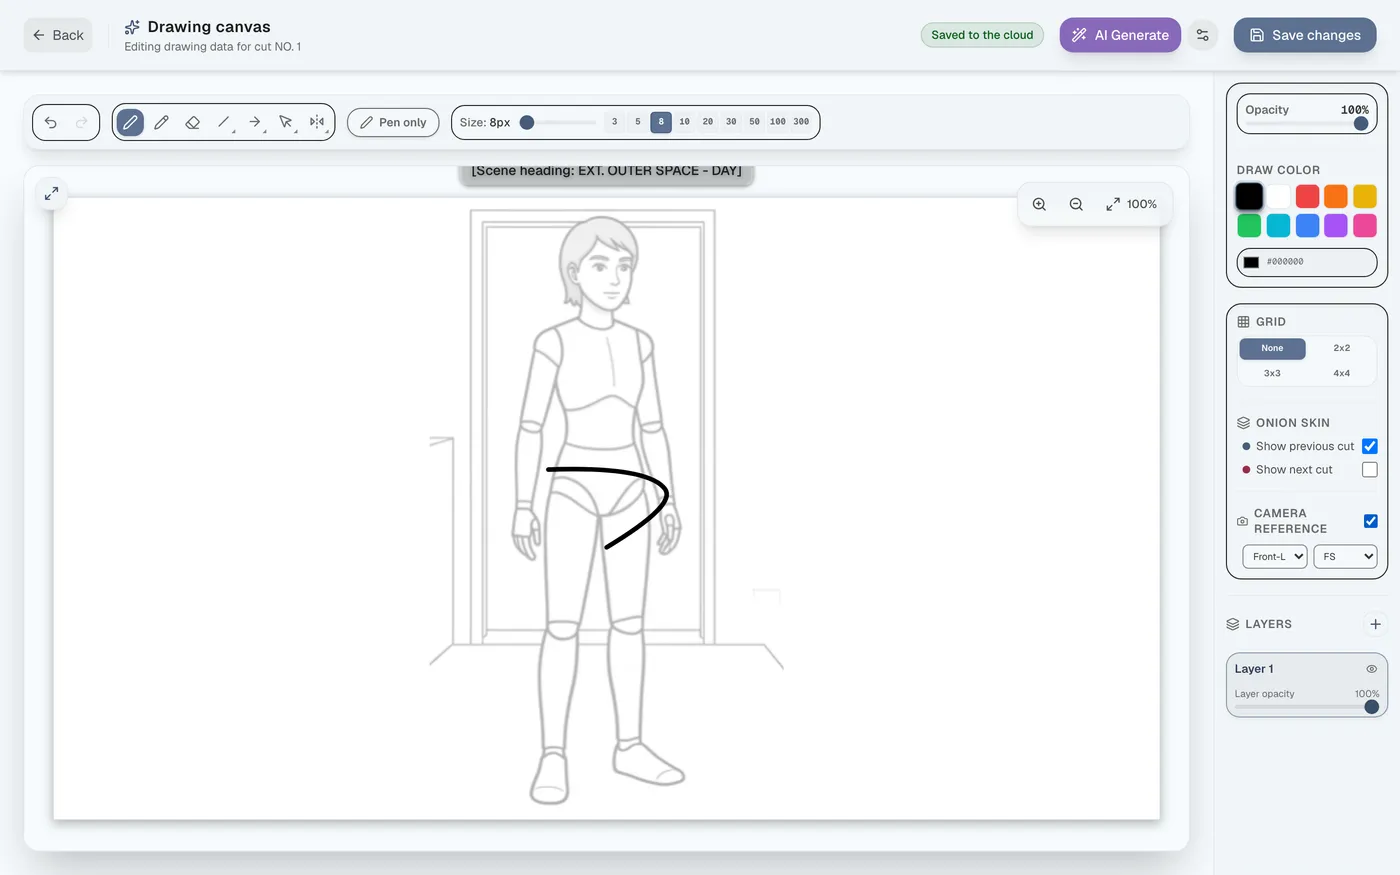
Figure 4.11: Camera-work guideline display
Figure 4.12: Specifying angle (in 45° increments)
Figure 4.13: Specifying shot size (frame size)

Layer Management and Checking Action/Dialogue#

You can add an unlimited number of layers. Action lines appear at the top of the canvas, and dialogue at the bottom.
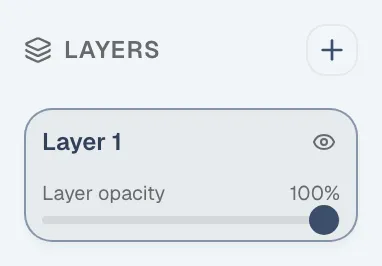
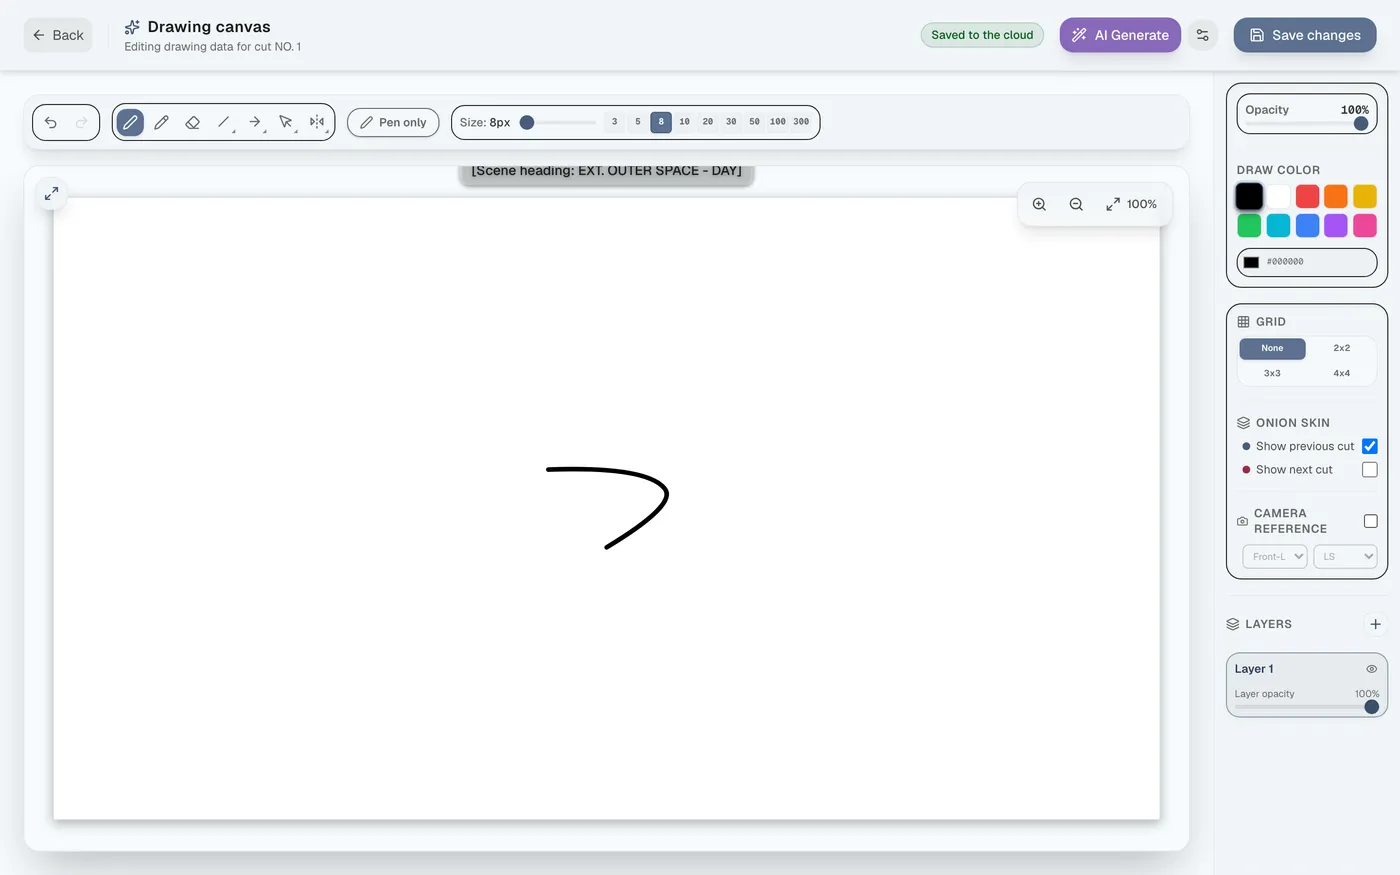
Figure 4.14: Multi-layer feature
Figure 4.15: Action/dialogue check areas at top and bottom of the screen

Shortcut Reference and AI Directing Suggestions#

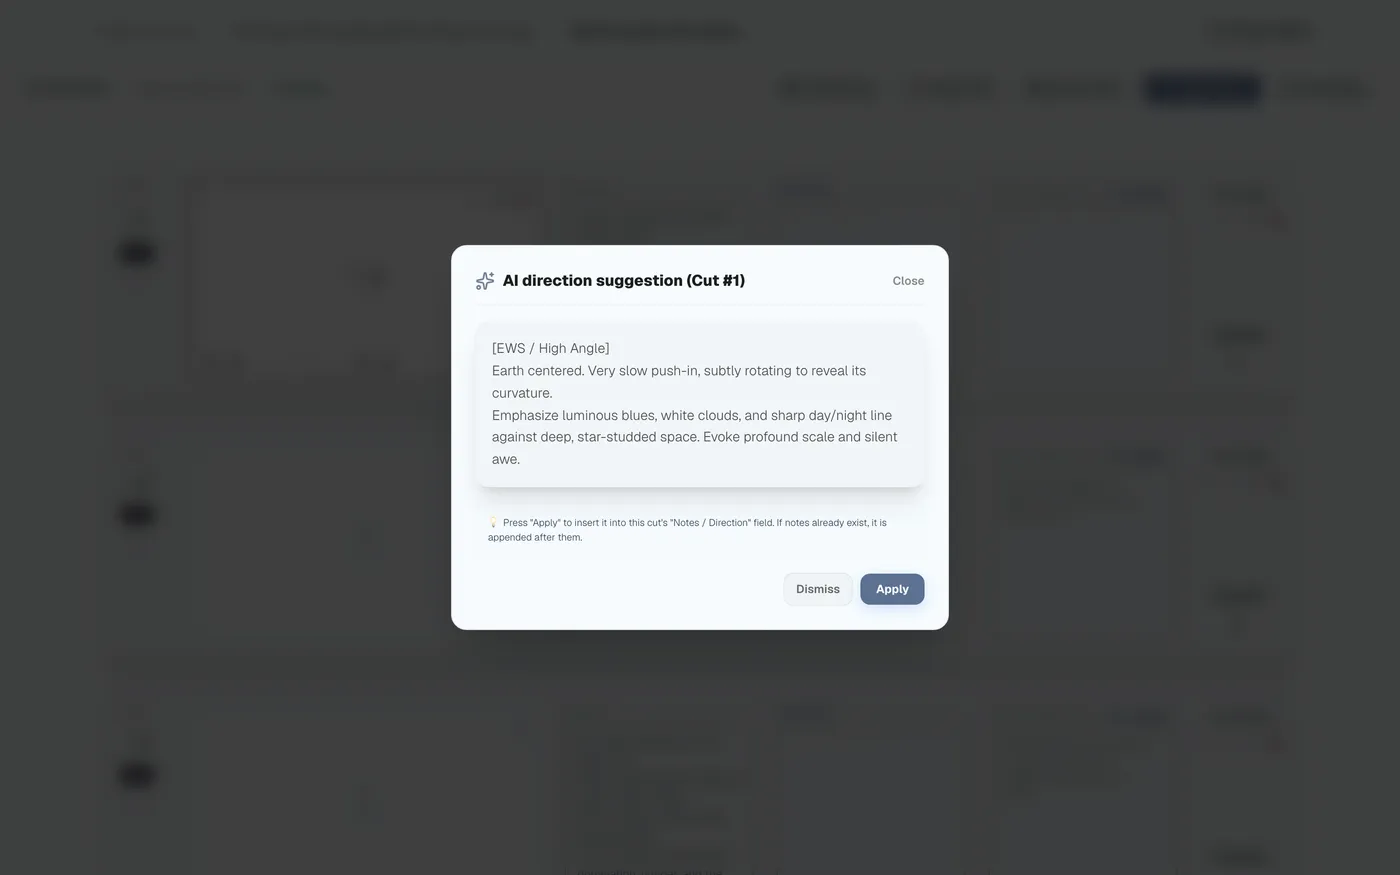
The “?” icon lets you check keyboard shortcuts. “AI Suggest” automatically generates framing and directing notes.
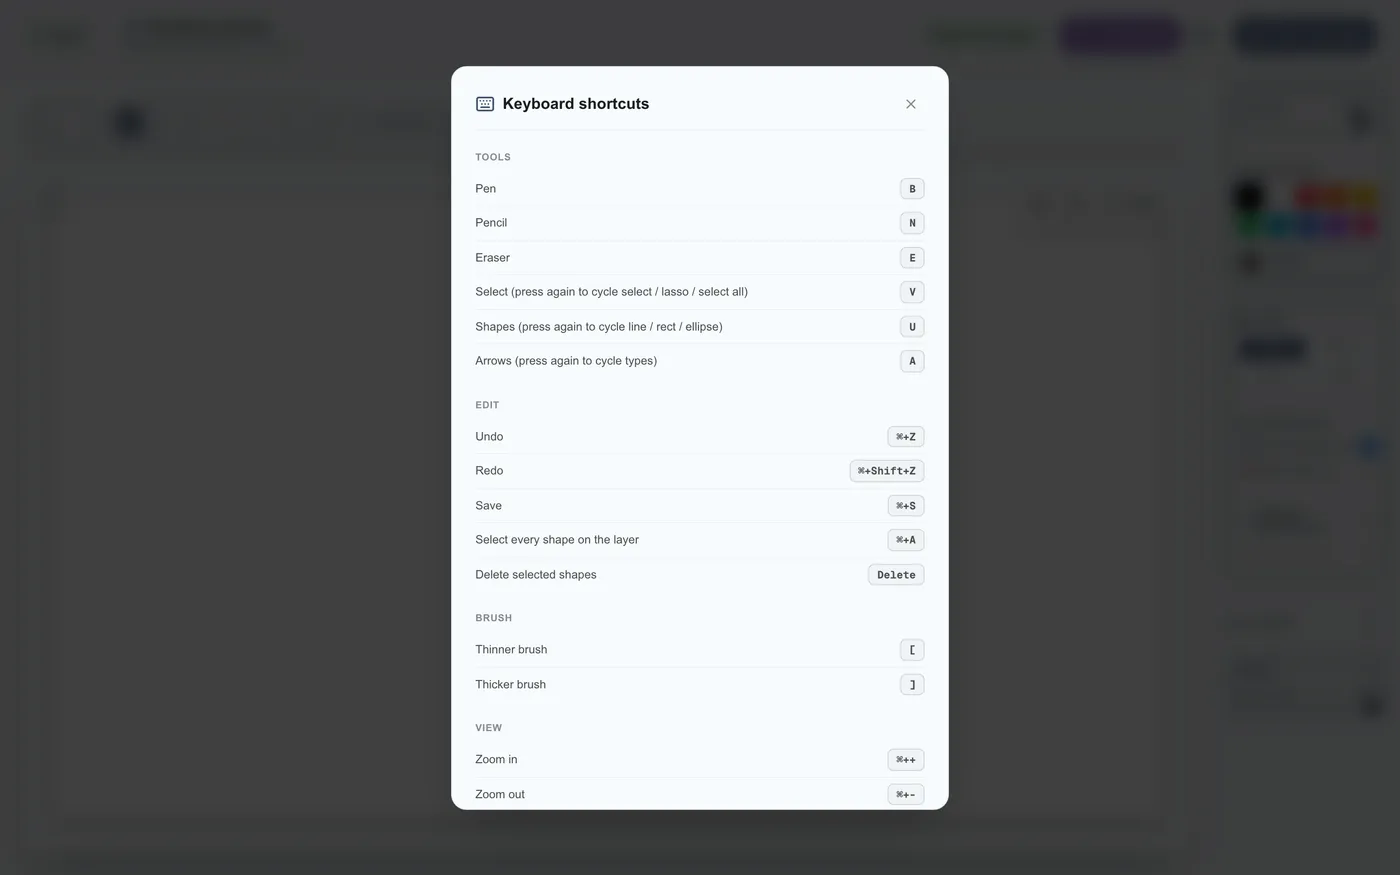
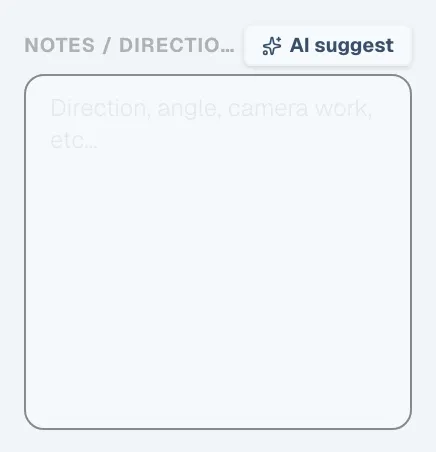
Figure 4.16: Shortcut-key reference screen
Figure 4.17: AI directing suggestion feature
Figure 4.18: AI-generated directing and composition suggestions

5AI-Assisted Drawing (Automatic SVG Conversion)

AI-generated images are automatically converted to SVG vector format, letting you use them as layer material you can freely retouch and resize.

Setting Up and Applying AI Image Generation

Image-Generation AI Settings Screen#

Press the icon next to “AI Generate” at the top right to open the settings screen and connect an API.
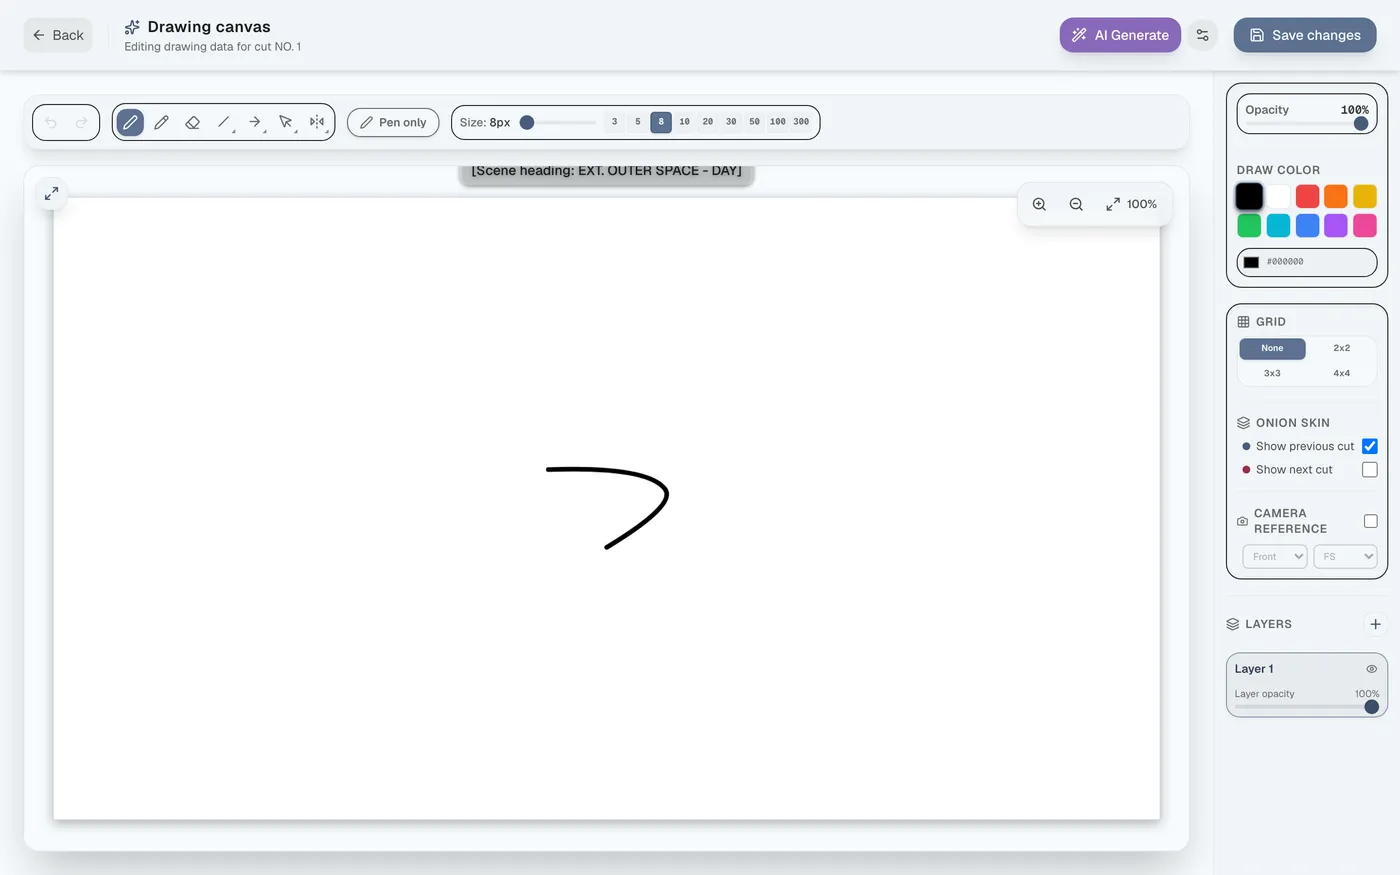
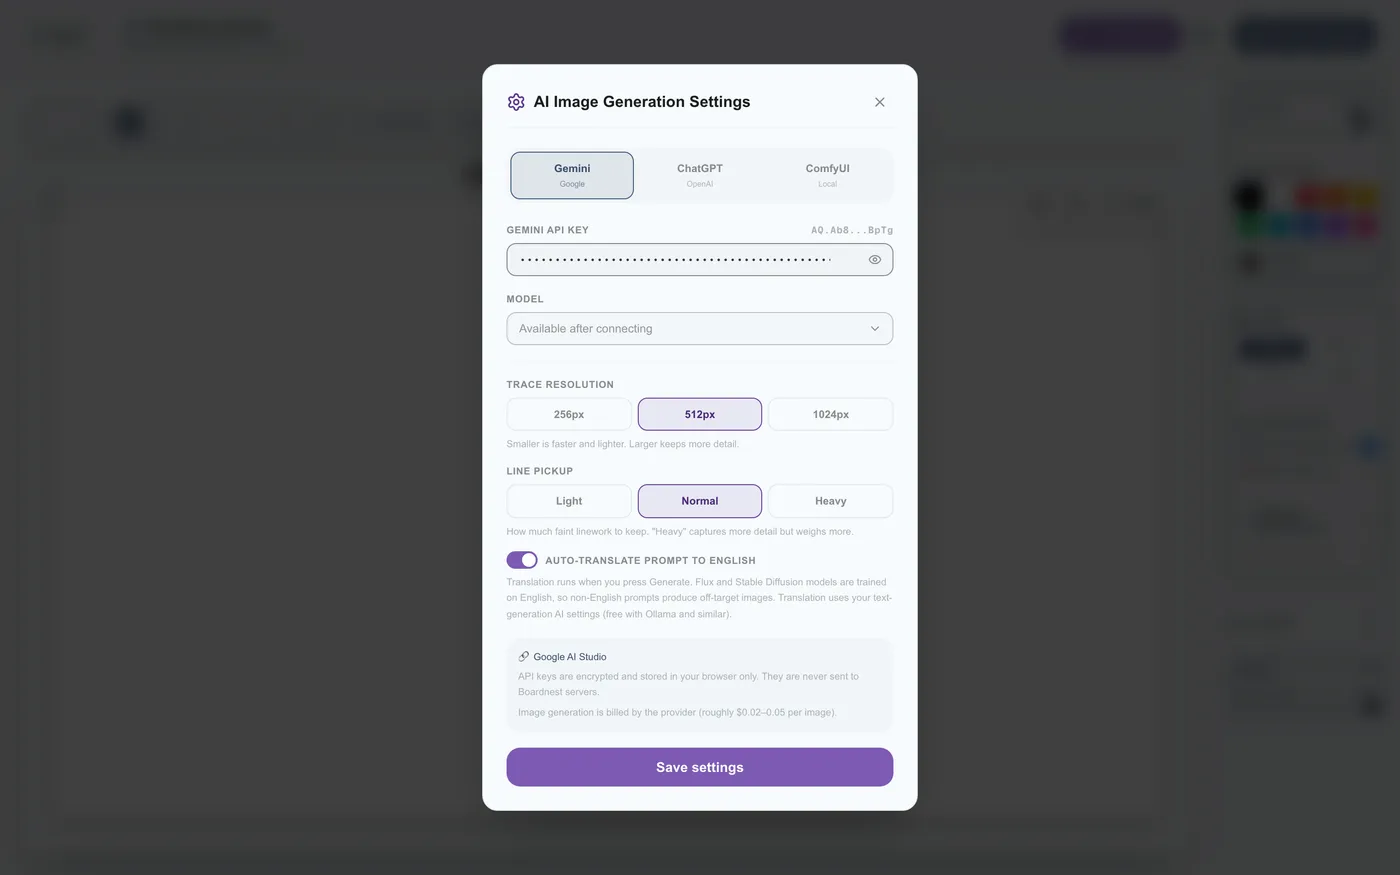
Figure 5.1: Opening AI image-generation settings
Figure 5.2: API connection (Gemini / ChatGPT / ComfyUI, etc.)
Figure 5.3: Selecting a model to use

SVG Conversion Accuracy and Translation Settings#

Choose the resolution and line-detection sensitivity for vector conversion. For ComfyUI and similar, we recommend checking “Translate to English.”
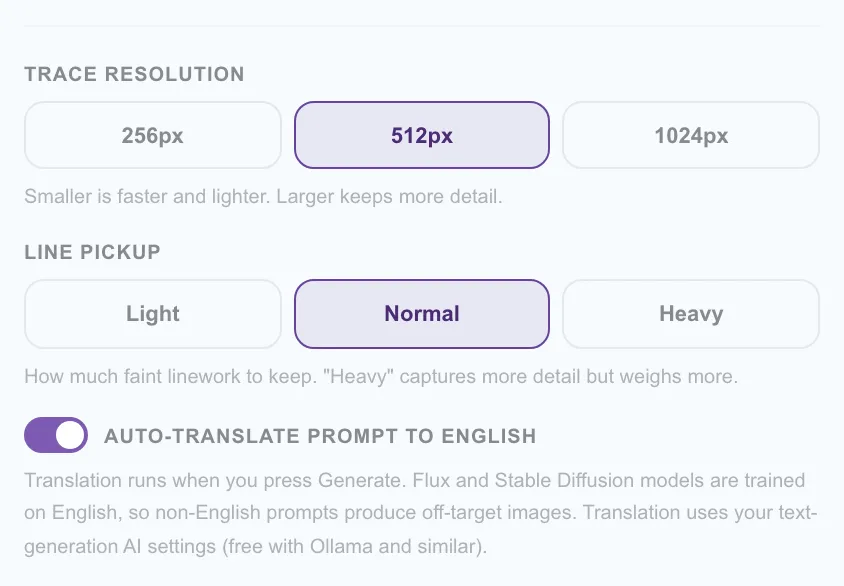
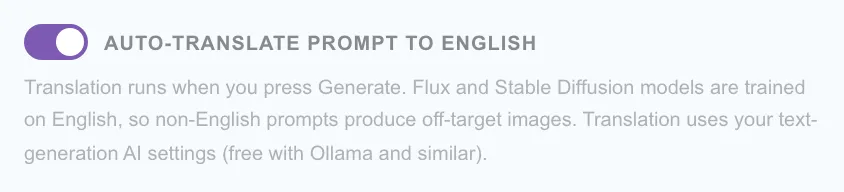
Figure 5.4: SVG conversion settings (resolution and line-extraction accuracy)
Figure 5.5: Automatic English translation of the prompt

Prompt, Character, and Style Settings#

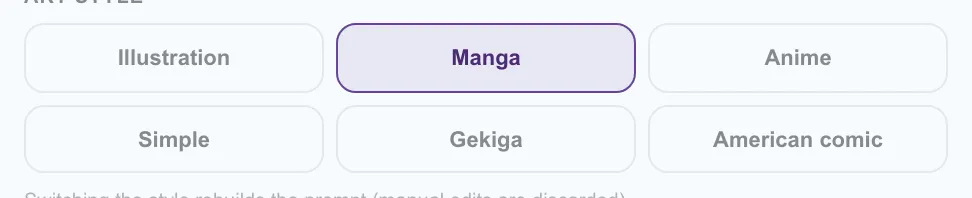
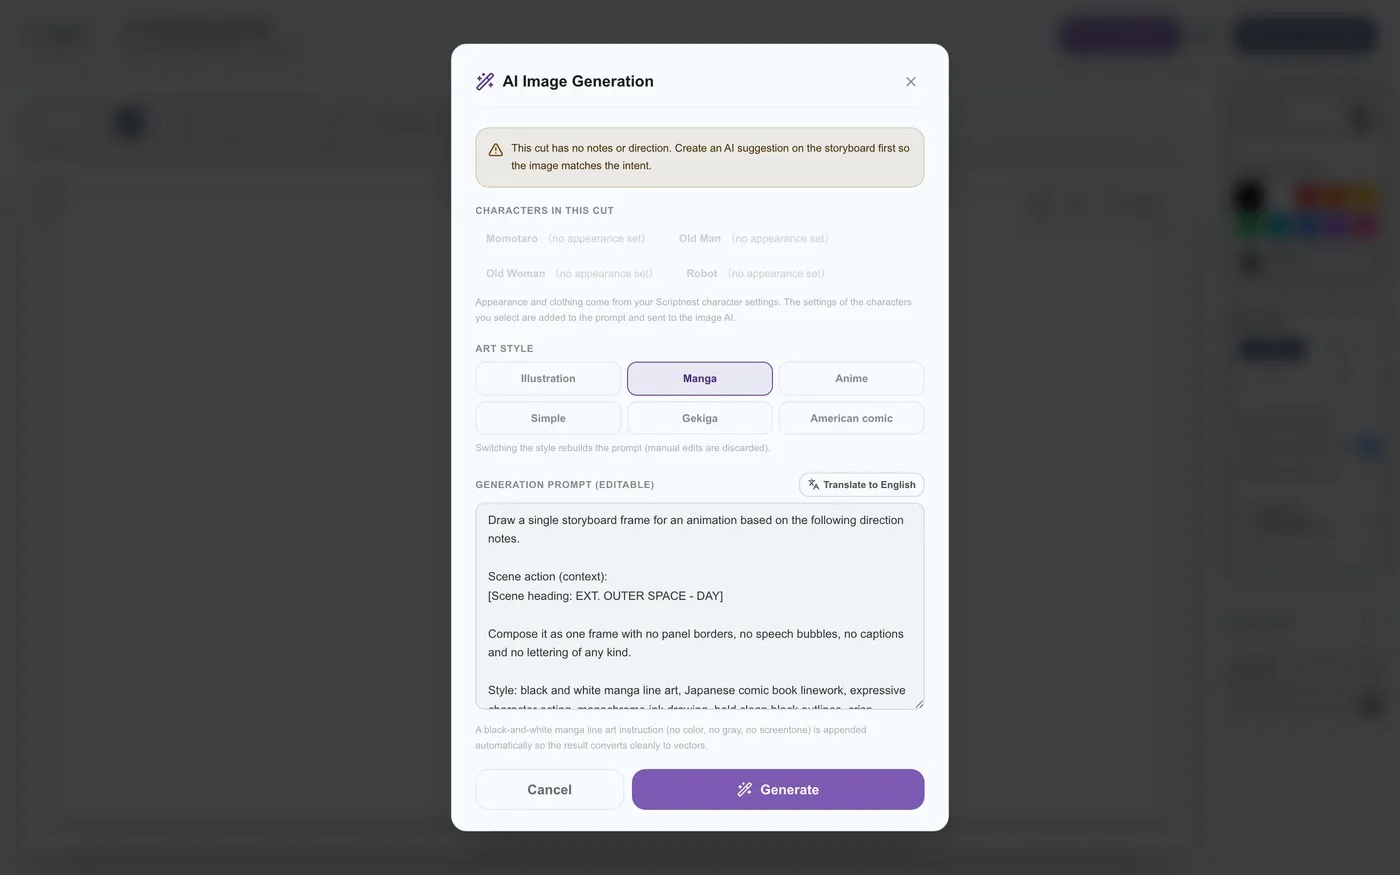
Select the characters appearing in the scene and an art style (illustration, anime, etc.), edit the prompt, and generate.
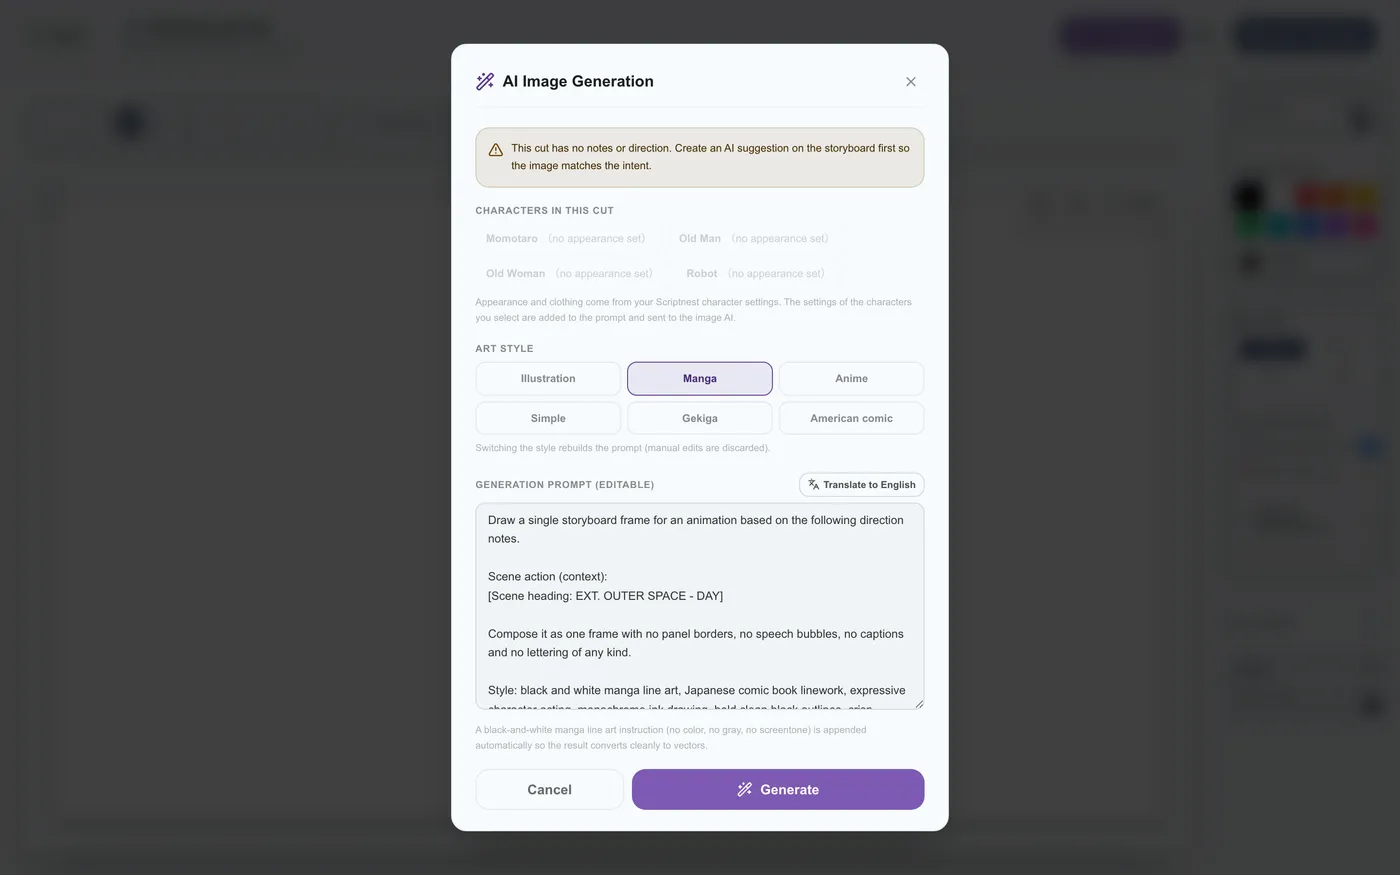

Figure 5.6: Image-generation settings panel
Figure 5.7: Activating characters
Figure 5.8: Specifying the art style
Figure 5.9: Editing the prompt and running generation

Adding the Generated SVG to the Canvas and Saving#

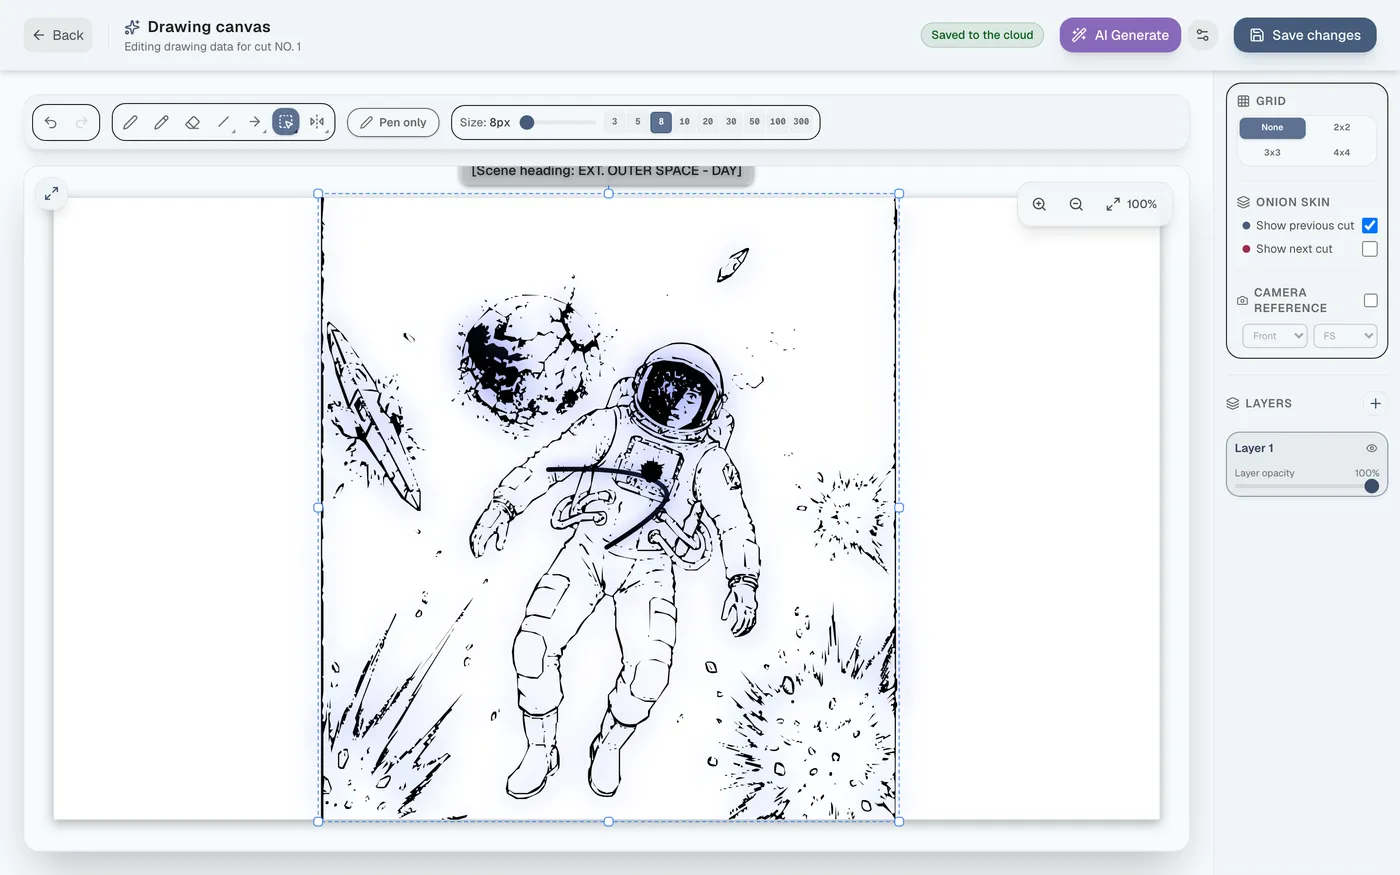
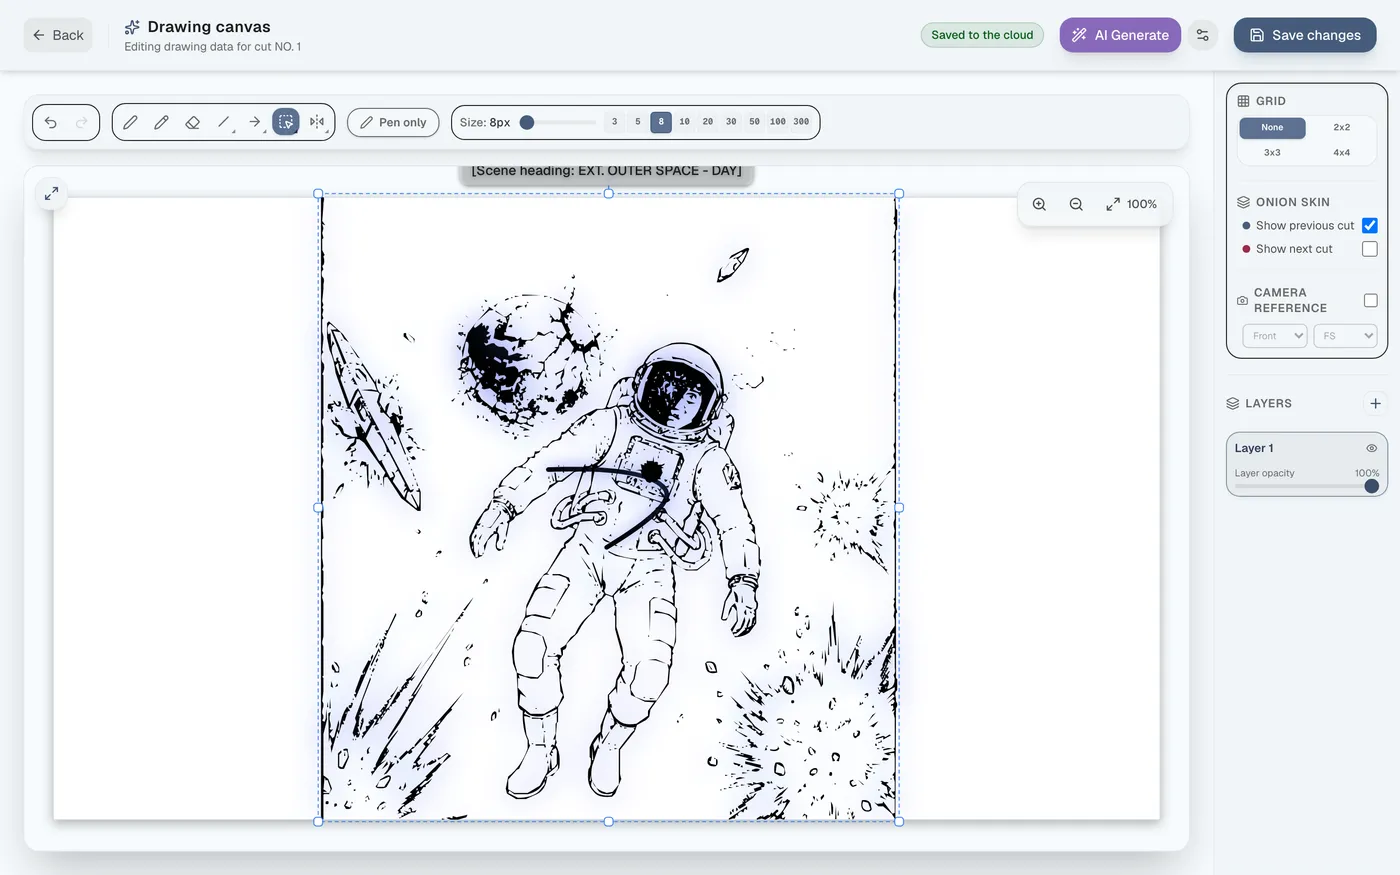
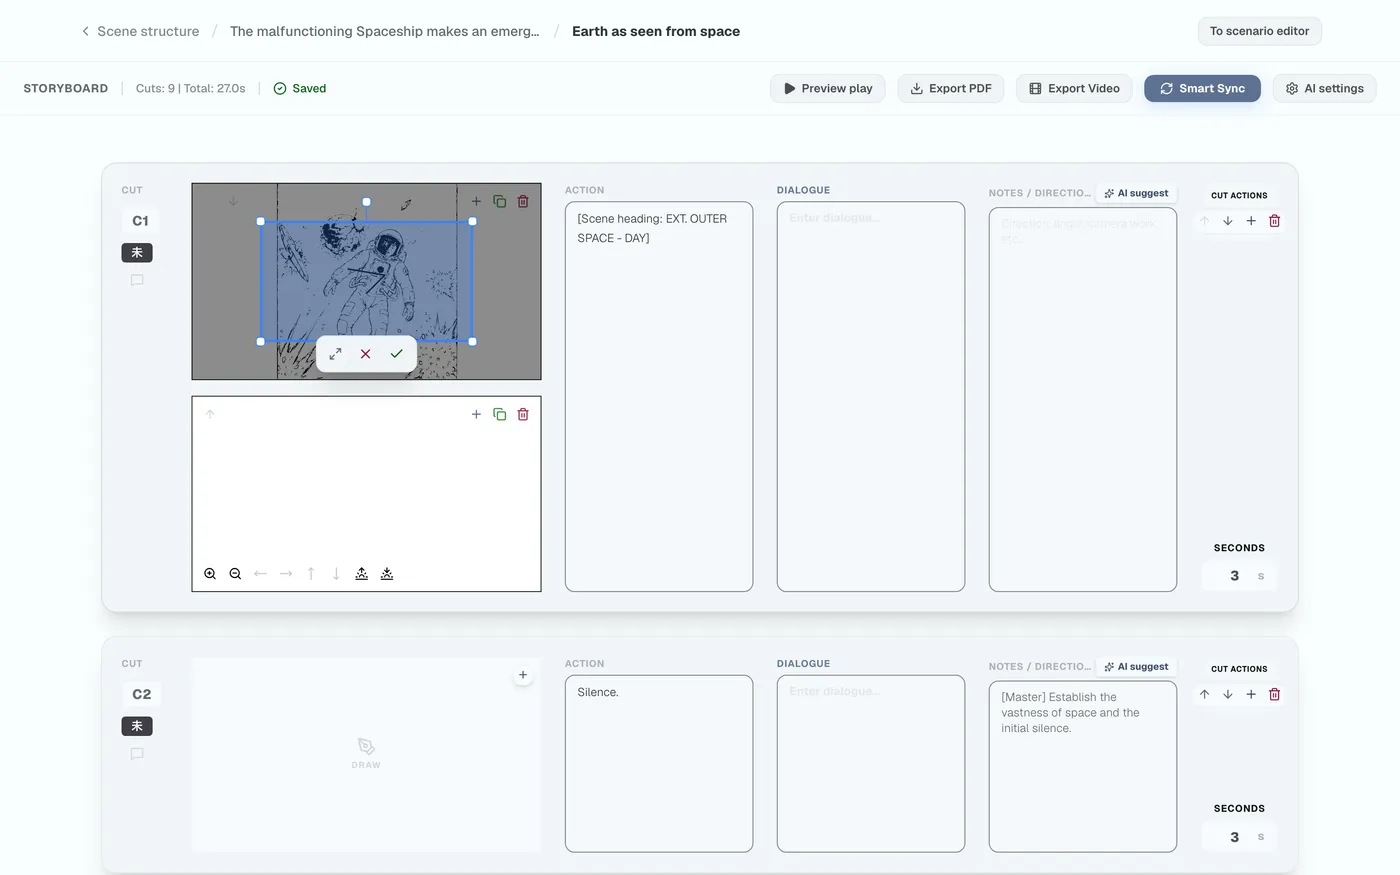
Review the generated SVG image, press “Add to Selected Layer” to place it, then adjust its position and size with the select-all tool and save.
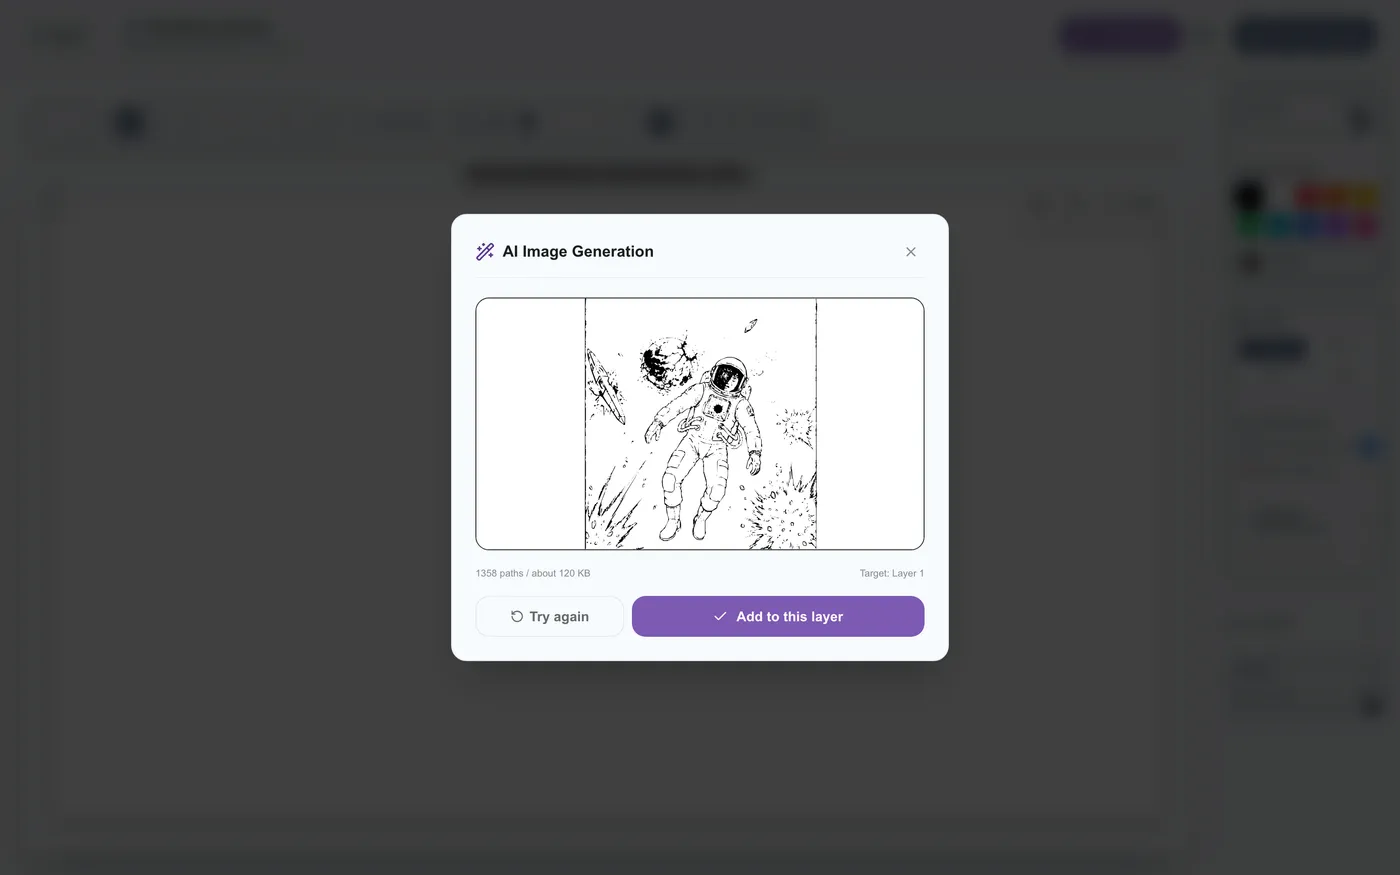
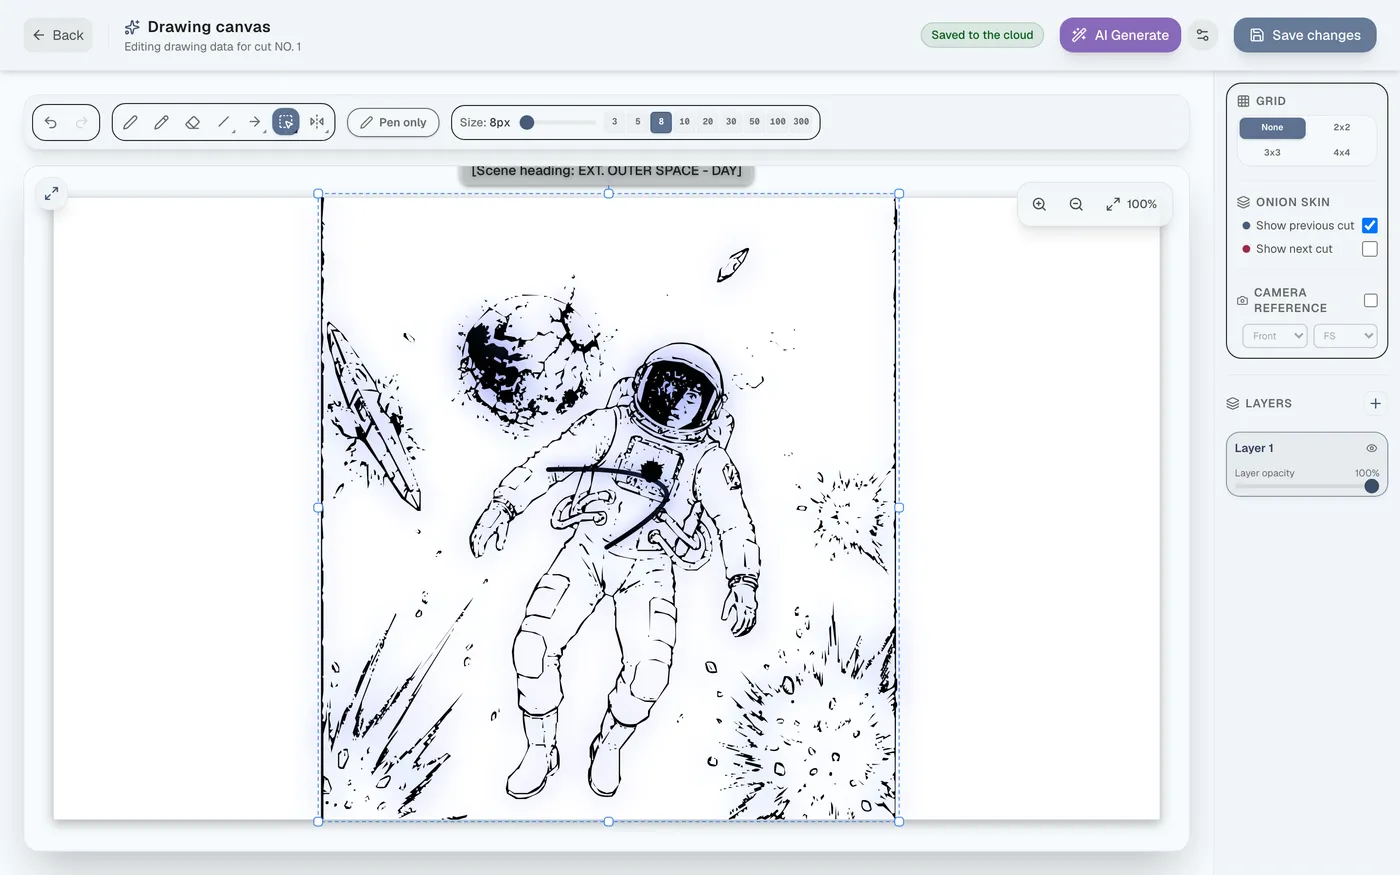
Figure 5.10: Reviewing the SVG result and adding it to a layer
Figure 5.11: Fine-tuning size and position with the select-all tool
Figure 5.12: Saving changes
Figure 5.13: Auto-save feature (Back button)
Figure 5.14: Reflected in the cut panel

6Preview, Export, and Progress Management

Supports animated direction across multiple canvases, real-time playback in the browser, and one-click export to PDF or video (MP4/WEBM).

Canvas Animation Settings

Adding and Reordering Canvases#

You can add, duplicate, delete, and reorder multiple canvases.
Figure 6.1: Adding, duplicating, and deleting canvases
Figure 6.2: Reordering canvases

Camera Animation (Pan and Zoom)#

The icons at the bottom let you set zoom in/out, pan, and fade in/out.

Figure 6.3: Camera direction animation settings
Figure 6.4: Setting the zoom target frame

Real-Time Animatic Preview and Various Exports

Real-Time Animatic Preview#

Pressing “Preview Play” plays back a video that reflects each cut's duration and animation, including a simplified dialogue playback.
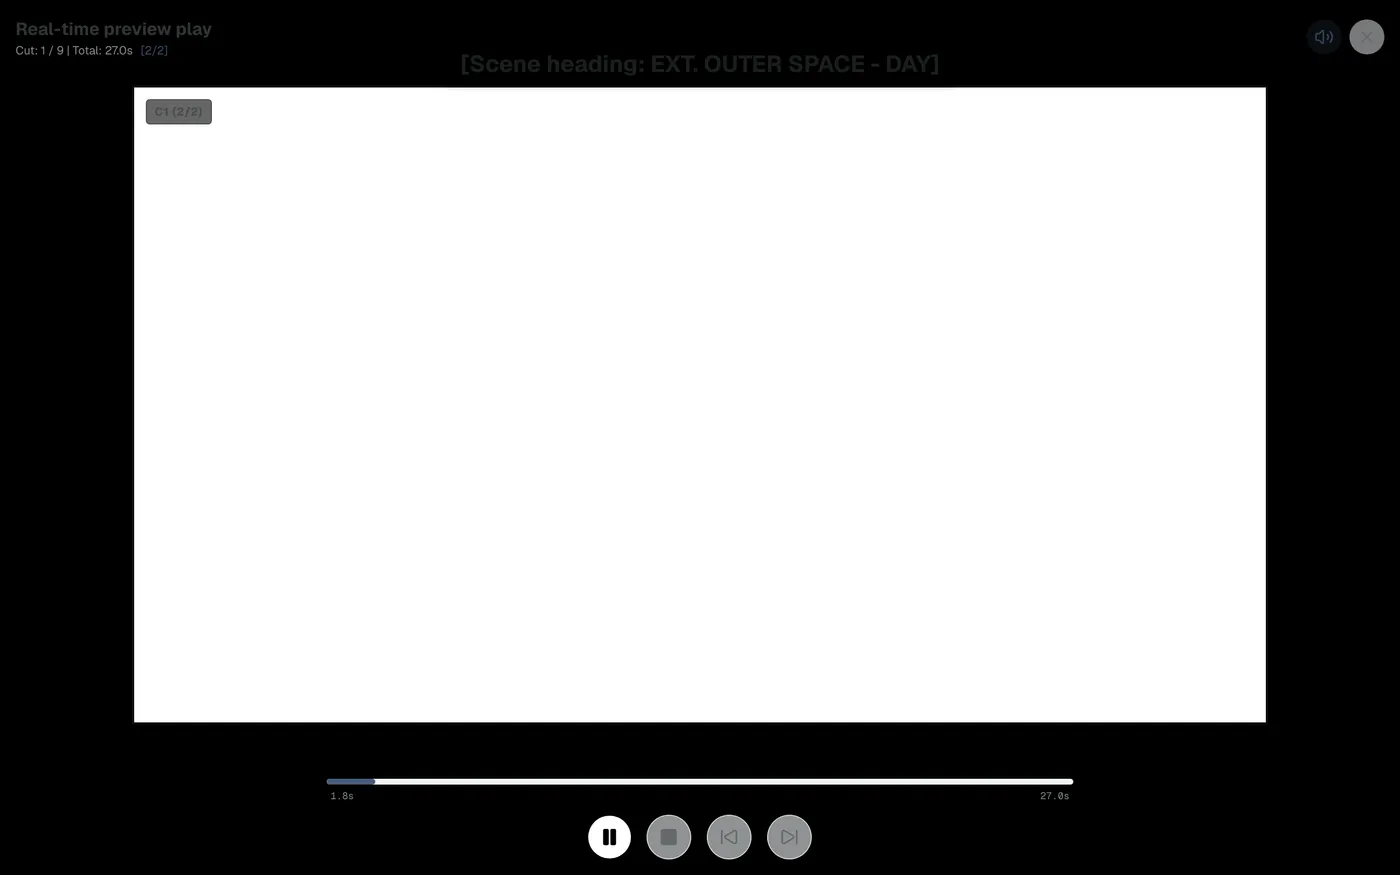
Figure 6.5: Running the preview playback
Figure 6.6: Real-time preview video playback screen

Video Export (MP4 / WEBM)#

From “Export Video,” select your preferred video format to download.
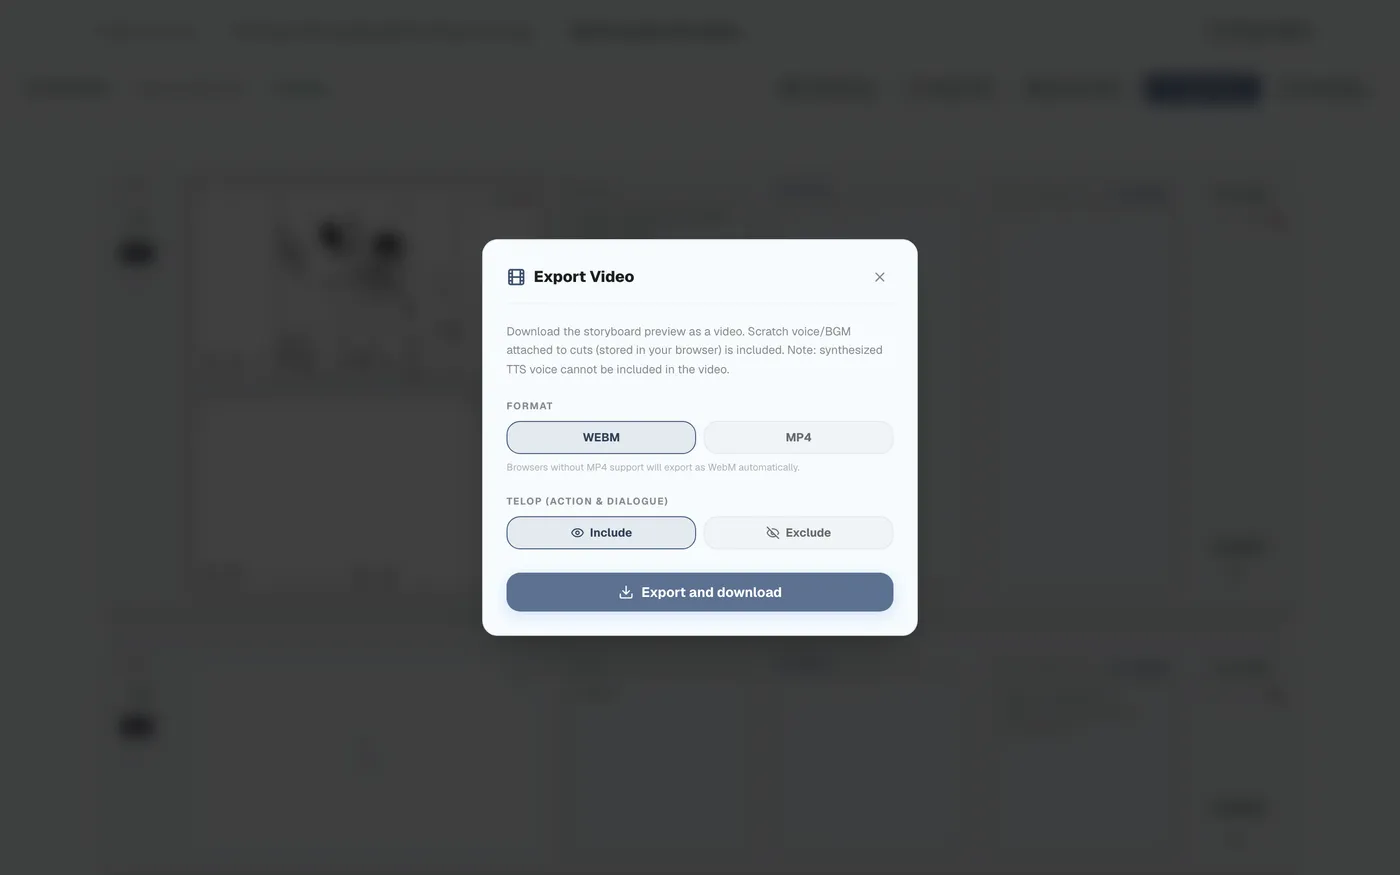
Figure 6.7: Exporting in video format (MP4/WEBM)

PDF Export#

Outputs a standard, print-ready storyboard PDF that can be shared on set right away.
Figure 6.8: Exporting as PDF

Progress Rate and Overall Monitoring#

At the bottom of the project structure management screen, you can see the overall progress rate and play back or export everything at once.
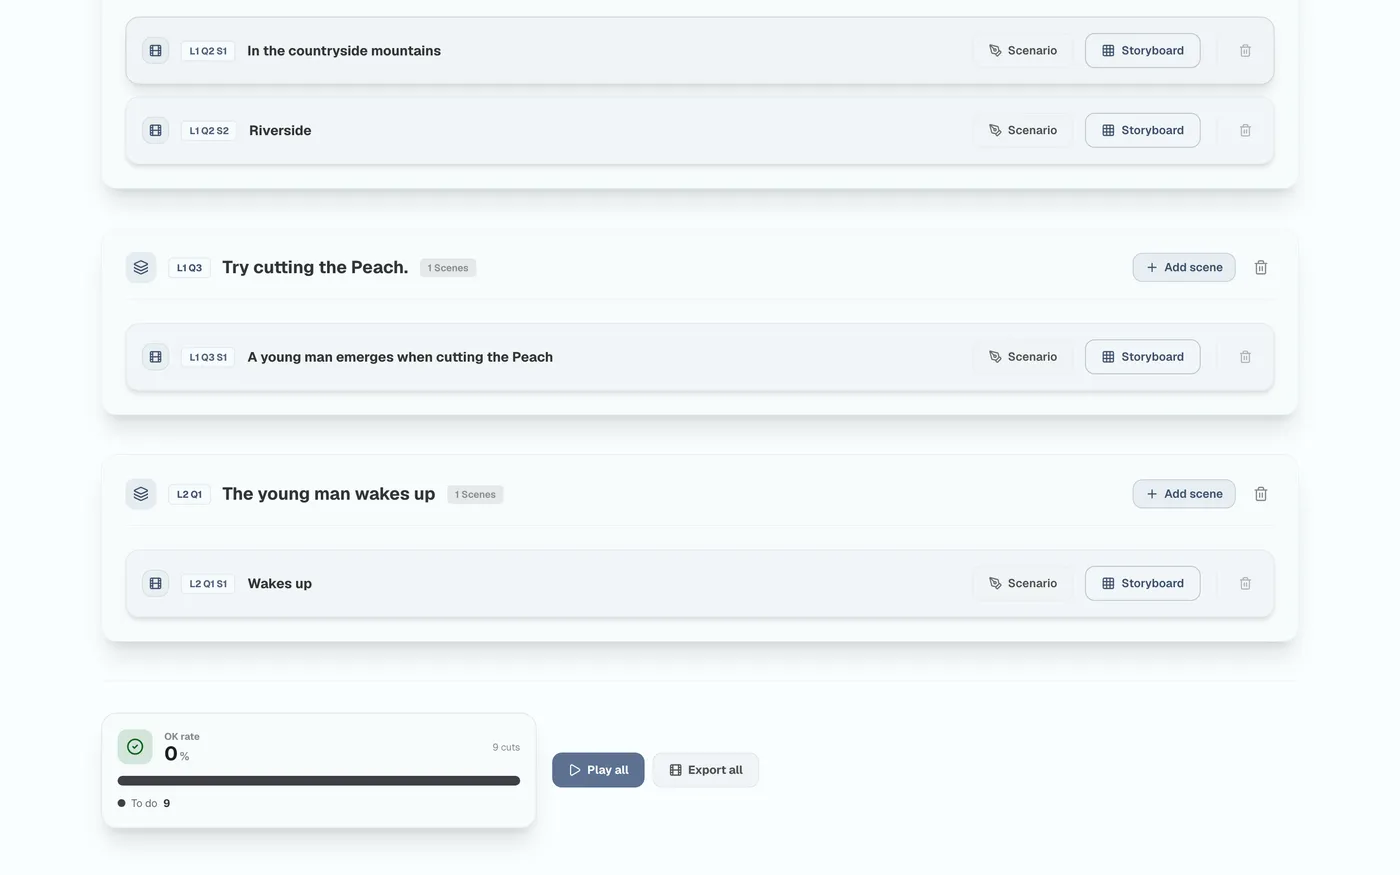
Figure 6.9: Progress-rate chart and bulk-action area

If you get stuck

Someone else may have run into the same thing. Ask questions or post requests in the community.

Visit the community